I'm a first-time user of MecaBricks. I've been using both LDD and MLCad up to this point. As a consequence, I started using MecaBricks with a LDD/MLCad mindset. That mindset needed re-tuning. It is possible that other new users will have a similar mindset when they first use MecaBricks. I have put together a short primer (see below) for new users to get them going with using MecaBricks. It's purpose is to get people interested in using MecaBricks so is consciously not an extensive "how-to" guide. The primer begins after this paragraph.
This primer provides a brief introduction on how to use the MecaBricks Workshop. It is a simple "how to get started" guide. As such, it describes only a small amount of the MecaBrick workshop's capabilities - enough to whet your appetite and want to come back for more. The primer is presented as a sequence of 10 steps, with each step assuming the previous step has been undertaken. Each step is formed by some descriptive text and one or more screenshots.If you are used to using either Lego Digital Designer (LDD) or Mike's LEGO CAD (MLCAD) to design your model, note that a slight mindset shift will be required when using MecaBricks. It's not a big difference but it may be enough to have you scratching your head to begin with. Attention will be drawn to the difference at an appropriate point in the primer.
The MecaBricks workshop can be trialed without the need to create an account. This primer assumes that you have you browser opened and are already in the MecaBricks workshop. If you aren't, please navigate to [url]http://www.mecabricks.com/en/workshop[/url]. So without further ado, here are the 10 steps that make up the primer for first time users.
1) Pick a colour

Figure 1 - Pick a Colour
The lower part of your browser window is where you select the part that you want to add. There is a pop-up list which categorizes the parts. When you pick a category, the list of available parts will change to reflect the chosen category.
Begin by picking the colour that you want the part to be, Click on a colour in the bottom right hand side of the window (see Figure 1). Note that if a part is selected when you choose a colour, the colour of the selected part will change. When you are looking to add a part which is different to the colour shown on the colour palette, ensure that no part is selected prior to selecting the colour.
2) Add a Part

Figure 2 - Part Loading
Use the forward and backward icons on each end of the list of part images to view the parts available within the selected category. When you see the part you want, click on it. You may see a "progress" indicator displayed while the part loads (see Figure 2).
3) Part Placed at the Origin

Figure 3 - Part placed
The first part will be placed at the origin (X, Y and Z co-ordinate of 0, 0, 0). Notice the three differently coloured arrows near the brick. Each part will have one of these and it will be displayed when the part is selected. The red arrow points along the part's X axis, the green arrow points along the part's Y axis and the blue arrow points along the part's Z axis. You will see the impact rotating a piece has on these arrows in step 9. It is also worth noting that in the bottom left hand corner is a similar (but smaller) red, green and blue axis indicator. These are used to indicate the current orientation of the view of the model being built. When you rotate the view, this indicator will rotate correspondingly.
4) Moving a Part

Figure 4 - Moving a Part
LDD/MLCAD mindset shift. The way a part is moved in the MecaBricks workshop is different to that for LDD and MLCAD. You move a brick by moving the mouse onto the axis for the direction which you want to move the brick (see figure 4). The arrow will change colour to yellow. Click and hold the left mouse button down and drag the part in the direction which you want it to move.
5) Select the Next "Target" Point

Figure 5 - Select First Target Point
The currently selected brick is drawn in red. When you move the mouse over the selected brick, it will turn blue and display some orange points. One use for these points is to determine where the next part will be added. When you position the mouse over one of the points, the point will turn green. Clicking the left mouse button will "lock in" the point as the target point.
6) Add the Second Part

Figure 6 - Add Second Part
Pick the next part to be added by selecting an appropriate part category, scrolling to the desired part and clicking on the desired part. The part will be added to the model using the target point of the currently selected part. If a part on the model is not selected when the new part is picked, the new part will be added at the model's origin (0, 0, 0).
7) Select the Next "Target" Point

Figure 7 - Select Second Target Point
Just as with step 5), a target point is selected on the newly added part. Notice that a target point has an X, Y, Z orientation, just like a part has. The axis orientation for a target point may differ from that for the part (see Figure 7).
😎 Add the Third Part

Figure 8 - Add Third Part
Pick the next part to be added by selecting an appropriate part category, scrolling to the desired part and clicking on the desired part. The part will be added to the model using the target point of the currently selected part (see Figure 8 ).
9) Rotate the Part

Figure 9a - Part Rotation #1
Having placed a part, the arrow keys can be used to quickly rotate the part by 45 degrees along different axes. Pressing the right arrow key once will rotate the part clockwise around the Y axis (see figure 9a) (assuming the viewpoint for the rotation is looking towards the part's axes origin).

Figure 9b - Part Rotation #2
Pressing the right arrow key a second time will rotate the part clockwise another 45 degrees around the Y axis (see figure 9b).
The key combinations to rotate a part around an axis are;
Left arrow - Anti-clockwise rotation around the Y axis
Right arrow - Clockwise rotation around the Y axis
Up arrow - Anti-clockwise rotation around the X axis
Right arrow - Clockwise rotation around the X axis
10) "Show Me The Edges"

Figure 10 - "Show Me The Edges"
It is possible to change the way in which parts are displayed. For example, edges can be added to the model (see Figure 10), which you may find will make it easier to see individual parts.
Conclusion
The MecaBricks workshop is a powerful CAD tool for LEGO. This primer has touched on a few of its capabilities. You are encouraged to explore and experiment further to discover more about it.
How do you delete bricks?
Two options, @ HannaHopmann, either click on the brick until it (and only it) turns deep red and then press DELETE on your keyboard (or click the little trash can icon in the menu on the left of your screen), or select the part from the list of parts used on the upper right of your screen and delete in the same fashion. You can select multiple parts by holding the CTRL button as you select them (they'll all turn deep red as you do). 😃
Thanks, @gingerwitch !
Hello all I started this 2 days ago (this is the first time I'm using online building) and I'm already running into problems. So I'm working on a project but I can't get the right angle for a certain piece. (yes I've tried adjusting x y and z angles but none of them work for what I'm trying to get.) Is it possible to upload a photo of the project here so can get some advice?
ps, I'm already loving this site (except for that one issue), everything is pretty straight forward and the controls are easy to follow.
Regards
Aaron
Hey, @aaronvector_official. Yup. (Ish.) Host it elsewhere and either leave the URL here or you can integrate the pic into a comment or post by placing the url between img tags. (Scroll down to the img entry here for an example of how to do that.)
Also, side note, sometimes it's easier to see what you're doing if you use the wireframe view (you may need to hide the objects around it to see it more clearly).
Thank you @gingerwitch. I'll try to get it uploaded
No worries, @aaronvector_official. If you get stuck, give a shout. 😃
Damn... I was not expecting it to be so much...
ps, it seems ;like it has been deleted
is there a way to like bend a rope around your build??
Yes, @bas-vries. First the part must be flexible or you can't. Select the part. In the "OBJECT" tab to the right of the workspace, if it's a flexible part, underneath the NAME there's a checked box "FLEXIBLE". As long a flexible part is selected, there's a flexible tool that then appears on the left of the workspace that's otherwise greyed out (it looks like a sort of sideways X above the MOSAIC tool, and it's eight up from the bottom). Click on that and then you can bend and flex away by moving your pivot points. You can also snap the pieces to others (or vice versa) by using the snapping tool (the magnet icon towards the upper left) if that makes your life easier.
How do I make a folder for a part of my build? so that I can move the entire build instead of 1 by 1?
@Ty_Dye

can you re-open the workshop on an incomplete model that you are working on, or do you have to make it all in one hit?
@caveman, if you save the model (in WORKSHOP, FILE -> SAVE AS; and thereafter SAVE), yes, you can return later and complete it. Sometimes autosave will recover allow you to it as well, but it isn't a great idea to rely on it.


how do you make custom parts
that one is a bit complicated
@Patton1110, if you are interested in custom decorations, @B1Trash made an amazing guide that you can find here: https://www.mecabricks.com/en/forum/topic/2925/1
If you want the part itself however, and not just different decorations for existing parts in the MB database, that won't help you though.
And now a question of my own... 😉 I was building 76385 (my build on MB), the Harry Potter Hogwarts Moment Charms Classroom set. One of the pieces is 3069bpb0649 Tan Tile 1 x 2 with Groove with Reddish Brown 'Wingardium Leviosa' and Wand and White Feather Pattern. When I type '0649' into the MB parts search bar, it doesn't show up. A search by 'feather', however, was successful, and it's part '3069d251'. The names don't always match those in the bricklink database, so that approach isn't always successful. How should you normally go about finding pieces like that?
@gingerwitch-
-
Thanks for the shout-out!
-
To answer your question...
TL😉R- Try searching without the leading zero.
So this will be conjecture on my part, but what I think is happening is that BrickLink added a leading zero to the decoration part of the identifier. When that part came out, it was the 649th 1x2 decoration that BrickLink cataloged for the 3069b tile. As they add decorations, they increment by one. Initially the BrickLink reference would have been 3069bpb649. At some point, they started getting ready for the fact that they will have more than 999 decoration variations of that element. So BrickLink added a zero to the all of the decoration ID numbers for the 3069b tile. So,
3069bpb649 changed to
3069bpb0649.
When we decorate a brick in Mecabricks, we put in the BrickLink reference number, which at the time of creating that brick was (probably) just a 3 digit identifier. I can confirm that when I submitted MB part 3069d366 (link to MB parts page), the BrickLink reference ID was 3069bpb412. That was in February of 2021. Now when I look it up, it's got a leading zero -> 3069bpb0412 (link to BrickLink). Notice that the MB number increments similar to the BrickLink number... each decorated element increments by one. Decorated parts rarely match the trailing part number with a BrickLink reference. We would need to add them to MB in the exact same order that BL cataloged them, no skipping. But that's not how it's done. So the reference to BrickLink is important. Since this is added by hand, there can be mistakes. I've seen where two of the numbers were flipped. But when BrickLink goes and changed the ID number for 950+ parts... well then we have a (small) problem.
This is probably something that needs to be elevated to Scrubs to see how he wants to deal with it. He probably already has dealt with this before with other parts where BL changed their scheme. In the meantime, if you run into this problem again, do your search without the leading zero. It may net you positive results. For this part, 649 in the MB search bar did pull up the tile.
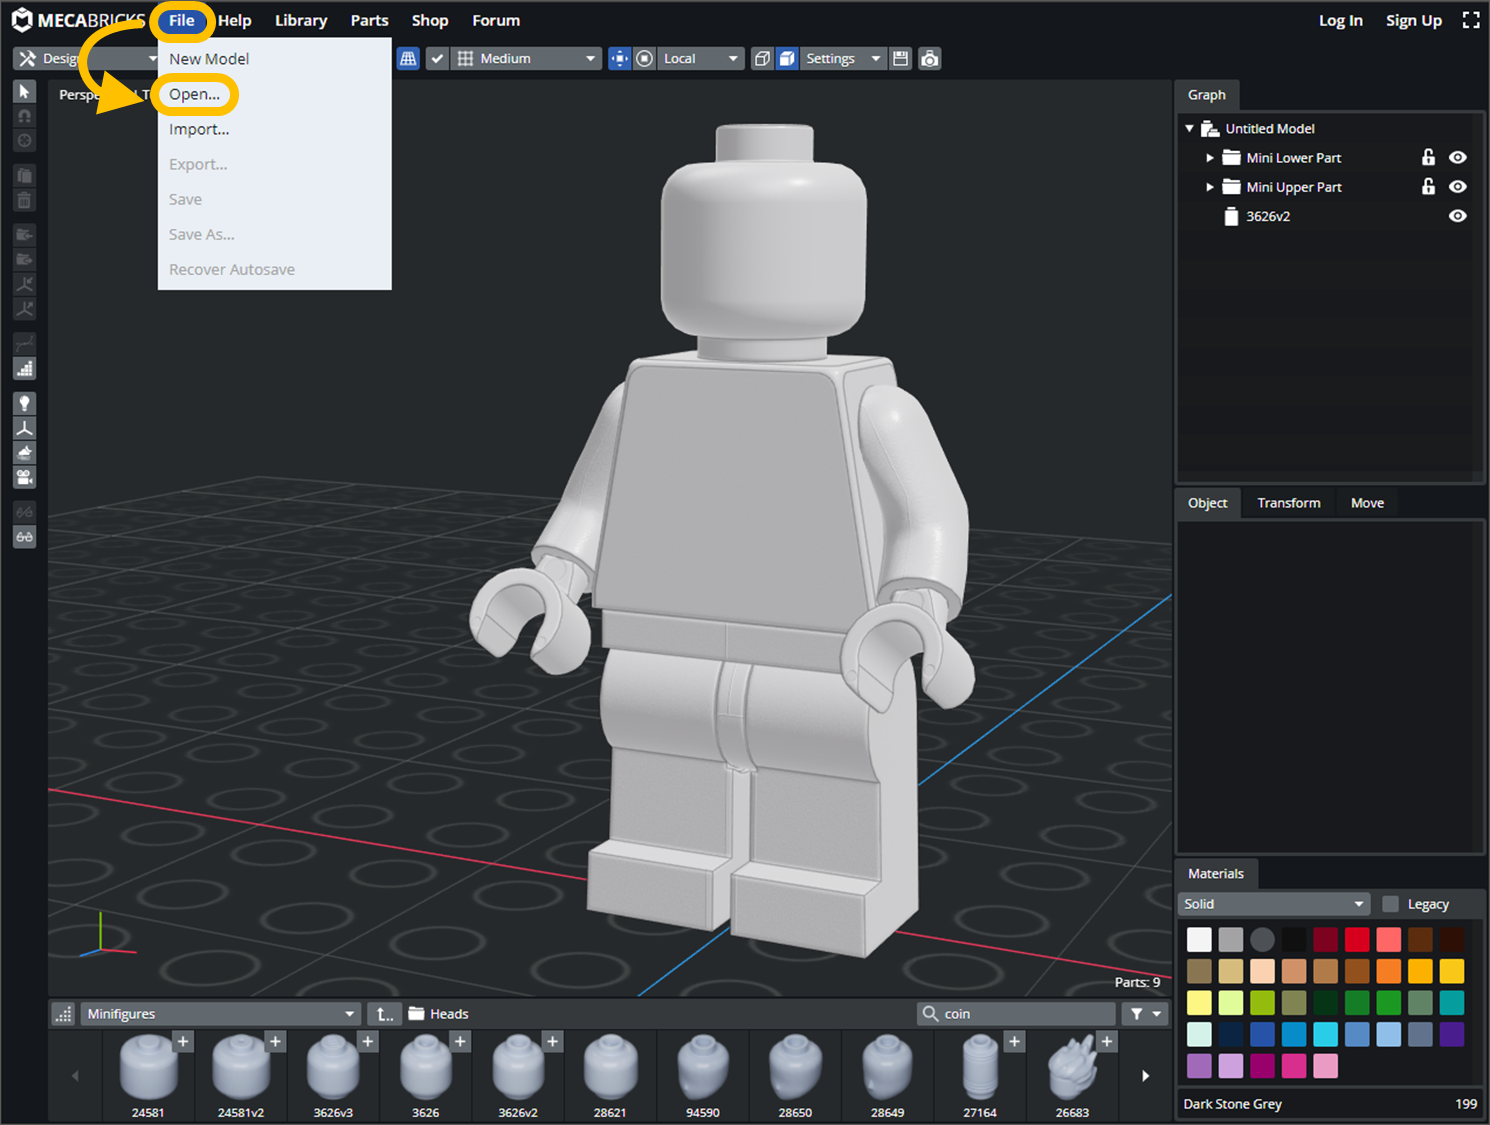
I have a question, how to open a saved file
@Murica-
Open the workshop. At the top left click File then Open...
LEGO, le logo LEGO, la minifigurine et les configurations des briques et tenons sont des marques déposées de LEGO Group of Companies. ©2026 The LEGO Group.
Mecabricks, le logo Mecabricks et tout le contenu non couvert par les droits d'auteur du groupe LEGO sont, sauf indication contraire, ©2011-2026 Mecabricks.