Here is a tutorial of one of the possible methods I use to recreate decorations for Mecabricks. This is probably the most time consuming one but it also gives the best result. This post comes in supplement to the general information I gave here.
I use Photoshop and Illustrator in this tutorial but you can use any software that you like. Another good free option is the pair Gimp and Inkscape.
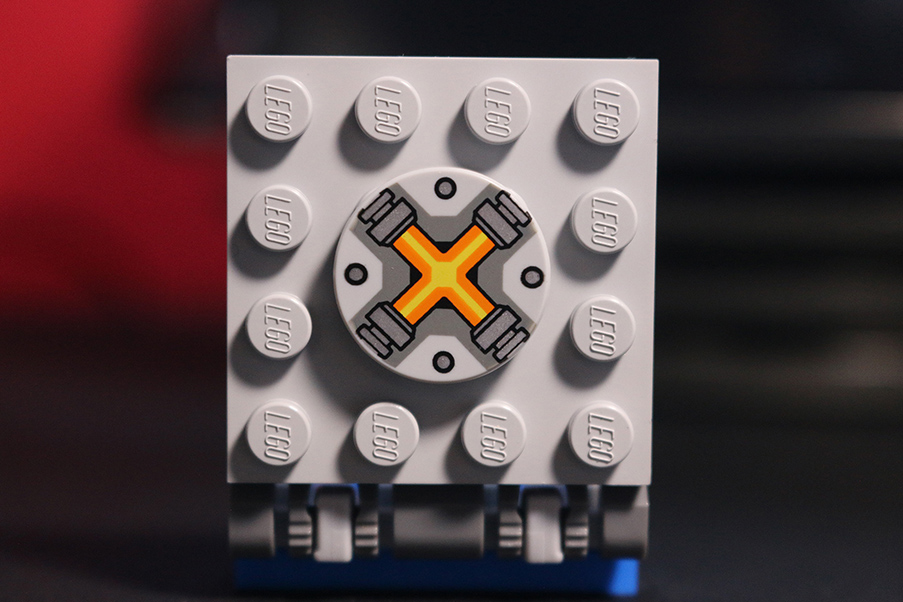
Step 1
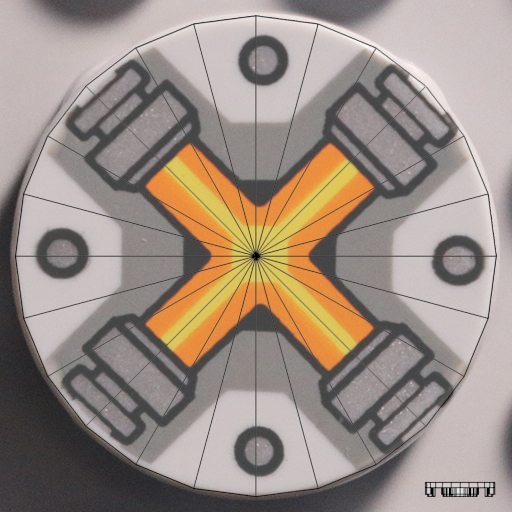
Take a picture or scan the piece you want to recreate. If you don't own it physically, look for high resolution images on the internet. in this example I used my DSLR to take a picture of it.
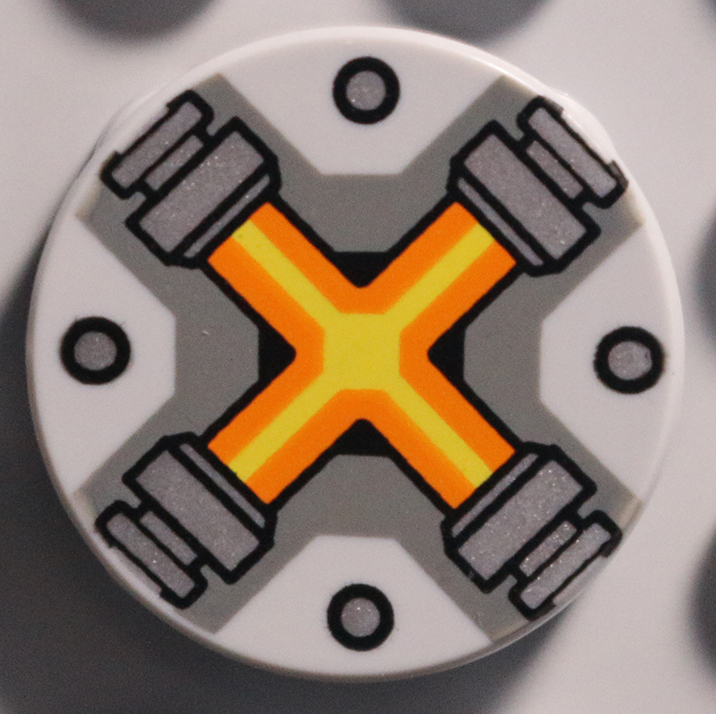
Step 2
To make it easier to vectorize, crop the photo before opening it in Illustrator.
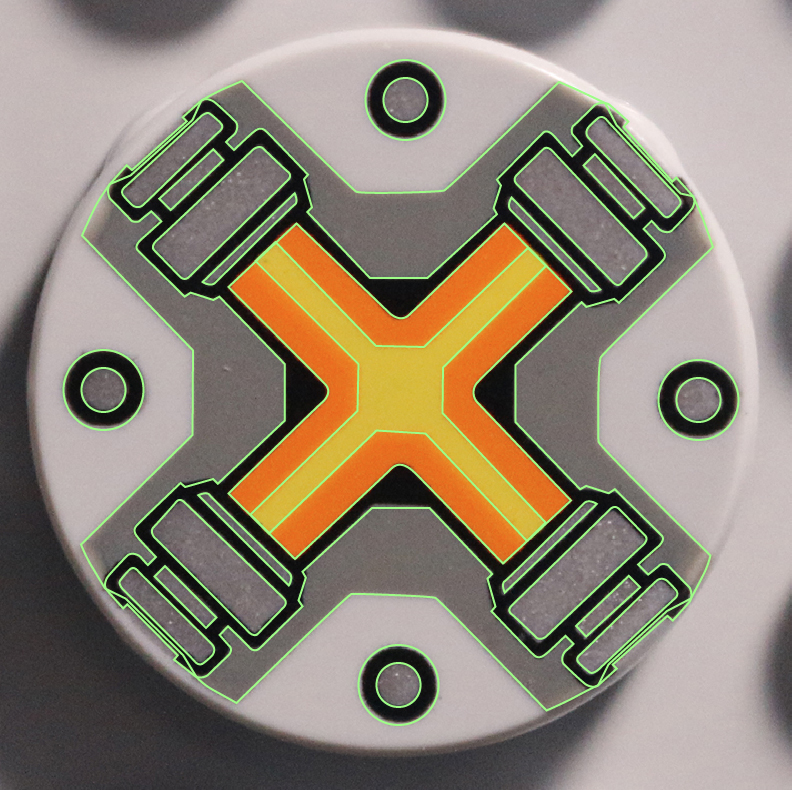
Step 3
Draw the edges in Illustrator. This step can be very time consuming if you wish to obtain a good result.
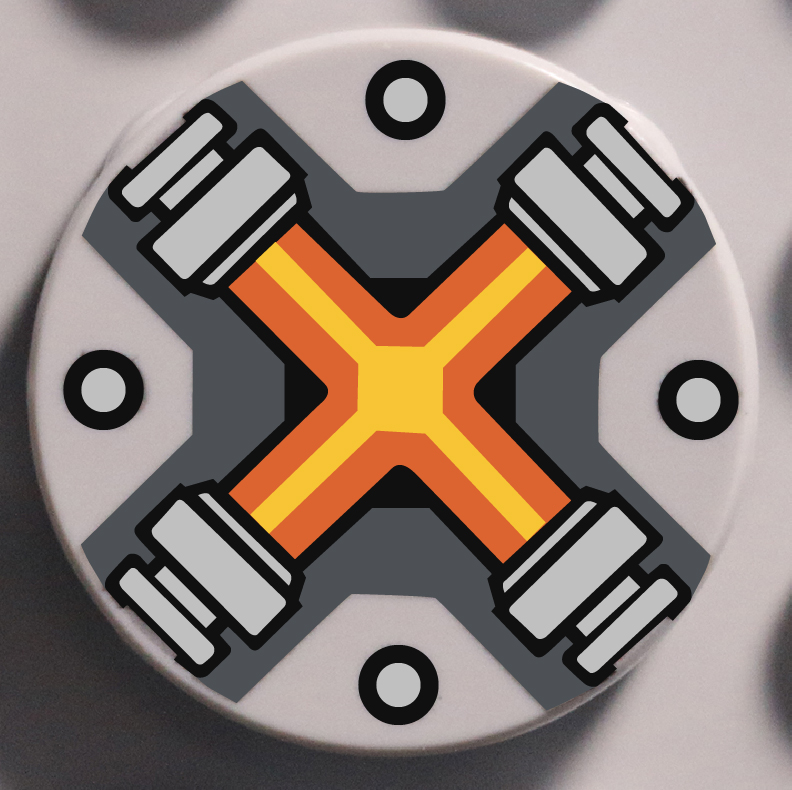
Step 4
Colour the decoration and remove the edges. Use the colour chart that you can download here to complete this task.

Step 5
Look for the appropriate uv map in this folder and open it in photoshop.
Step 6
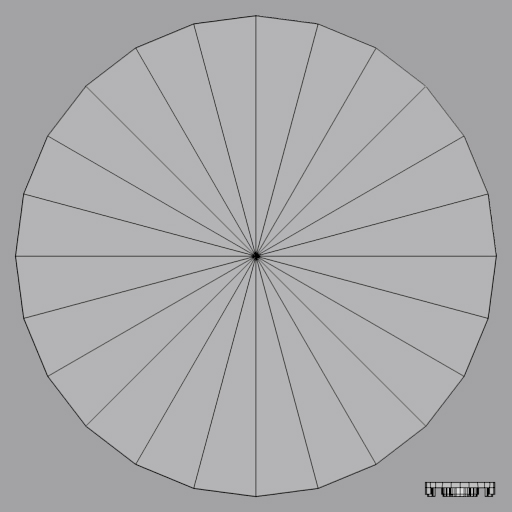
Add a layer with the background colour using the hex value from the colour chart.
Step 7
You can create another layer and add your original image under the uv map to help scale and locate the decoration.
Step 8
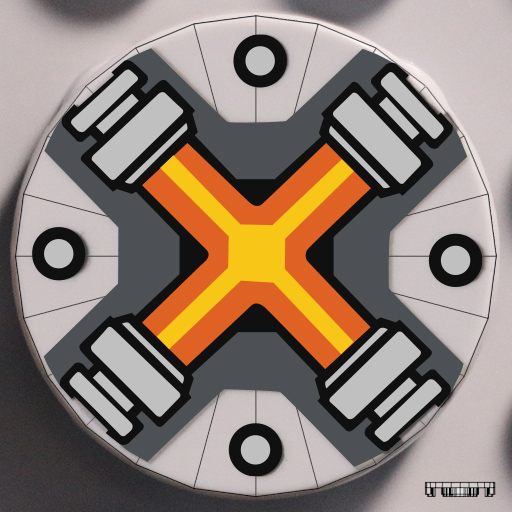
Import you vectorized decoration as a new layer. In Photoshop I select the option Paste as Smart Object. Scale and locate it correctly on the uv map.
Step 9
Hide all the unwanted layers before saving it as a png file.

Step 10
Send me your decoration via email using the Contact Us link in the footer of this page. Please include the references and names from LEGO - if available - and from bricklink to make it easier and quicker for me to add. They can be found on http://brickset.com and http://www.bricklink.com
So if we do create the bump map we need to send two files to Scrub for one decoration i.e. one actual decoration & the bump map, did I get that right?
Do we need to blur the edges in the bump map or keep them sharp?
No need to send files, you'll add them directly to the database (get in touch with Scrubs to be granted access).
Edges won't be blurred. Just "Save for Web" in Illustrator or export from Photoshop as PNG.
Sent me the all the files including bump maps/metal maps when needed.
I am working on a dropbox for decorationd and reference material which will come in the next week.
If you reused a bump map already existing in the database, just let me know which one it is.
I have a question about black decoration vs background color?
Just so i understand the differences! If i have a sticker decoration that contains black it should be 010101, even if it´s like the sticker background?
The background color 101010, is the brick color, the piece the sticker is attached to?
So to make a sticker decoration that has a black sticker background I need to fill the UV map for the whole sticker part(bump map inside area) with 01010, and then ofcourse do the other decoration details of the sticker. And then on the rest of the UV map i should use 101010 as background(outside area of the bumpmap).
Am i thinking right here or...?
//Sea
Hello,
It was a bit of a grey area in the past and is still a bit. However, what you described is how I do it nowadays so it would be perfect if you do it this way.
Ok, i 'll update my contributions to the drop box! 😃
I have a question about stickers with transparent "background"? Do I just use the brick color as background color for the uv map? As a noob I guess the UV should not be transparent where there´s no decoration on the sticker?
//Sea
Yep
For transparent use brick colour for background
Thanks Stas!
One more noob question, does someone have a list of the most common used fonts for text that Lego use for their decorations? For example registration plates on vehicles?
There's no such list.
I sometimes use https://www.myfonts.com/WhatTheFont/ to identiy fonts.
For registration plates try Arial Black or some Helvetica bold cut.
I have one small question about colors: occasionally (especially on minifigs) LEGO will print a certain color over that same color (i.e. dark red printing on dark red plastic) which will give a subtle but noticeable amount of detail. To my knowledge the Mecabricks pallette does not include these alternate values for many colors, so is there a process on how would one go about that sort of thing?
No, because there are so many slight variations, that it would be hard to cover them all. Usually Bricklink mentions the colors used on a print and these are the colors used by the decal makers based on the MB color table. At this, glazing colors are part of the variations, that are matched to the nearest one in the table, if it's not clear by the BL description which colors these are. In your render you're of course free to do what you want.
Hello all, I have some questions about creating decals. I did not see this information on the forum so far.
- Is the shape of the decal dependent on the UV map overall dimensions? I know it is there for the decal proportions, but should the final image edges be the exact size of the UV map layer?
- Is there a good minimum image size that is detailed enough for the final png? (Example, 2000x1800 pixels).
- If a part has reflective printing, should that be a separate image, or combined with rest of the decal?
- What is the best manner of finding out what has already made, just the "Parts" tab of the site?
Thanks for any help, and I know it is a lot of questions.
Edit: An example of a mining with reflective elements on shirt: https://brickset.com/minifigs/cty0527/construction-worker-orange-zipper-safety-stripes-belt-brown-shirt-dark-blue-legs-red-construction-helmet-headphones-orange-sunglasses
Edit: updated dead link.
Hello,
Here are the answers:
- Yes, decorations shall have the same size as the uv map unless a good reason is provided. The size has been is a balance between performance and details.
- See answer above.
- Yes it is a separate file that I call metalness map. This is a png file that can include 3 values: #ffffff for chrome, #7f7f7f for pearlescent or meta and #000000 for everything else
- Check the part section with the search field. You can enter bricklink reference (But parts added a long time ago may not have this information available)
Make sure you use the values from the Mecabricks colour chart.
Hope it helps.
How will a sticker across multiple parts be handled? (For example in 8145 Ferrari 599 GTB Fiorano 1:10).
It requires a separate mesh with the shape of the sticker. See the sticker category in the part library. Luckily it almost never happens nowadays.
Hey, is there a way to do this without buying illustrator? Thanks! 😃
@ArmoredBricks Yup! I use HitFilm Express, and other people on here use GIMP.
EDIT: I should note they are both for free, the same as Sealund's suggestion. 😃
I use Inkscape, it's for free!
Thanks! I'll try and get one of those! 😃
LEGO, the LEGO logo, the Minifigure, and the Brick and Knob configurations are trademarks of the LEGO Group of Companies. ©2026 The LEGO Group.
Mecabricks, the Mecabricks logo and all content not covered by The LEGO Group's copyright is, unless otherwise stated, ©2011-2026 Mecabricks.