Here is a tutorial of one of the possible methods I use to recreate decorations for Mecabricks. This is probably the most time consuming one but it also gives the best result. This post comes in supplement to the general information I gave here.
I use Photoshop and Illustrator in this tutorial but you can use any software that you like. Another good free option is the pair Gimp and Inkscape.
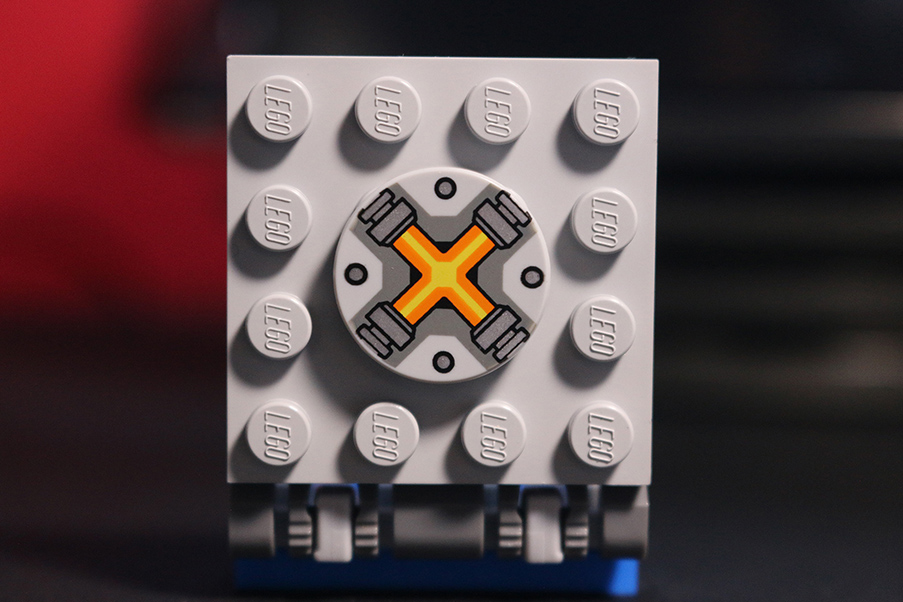
Step 1
Take a picture or scan the piece you want to recreate. If you don't own it physically, look for high resolution images on the internet. in this example I used my DSLR to take a picture of it.
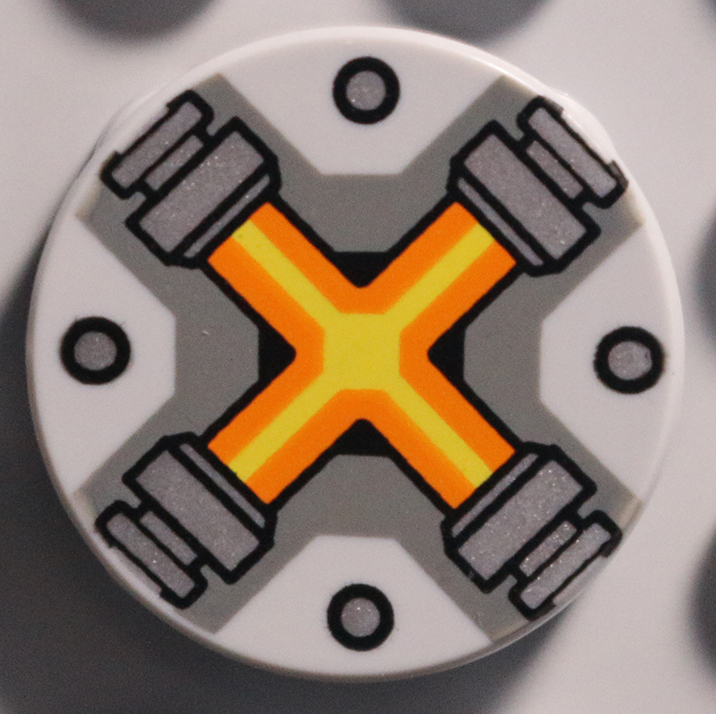
Step 2
To make it easier to vectorize, crop the photo before opening it in Illustrator.
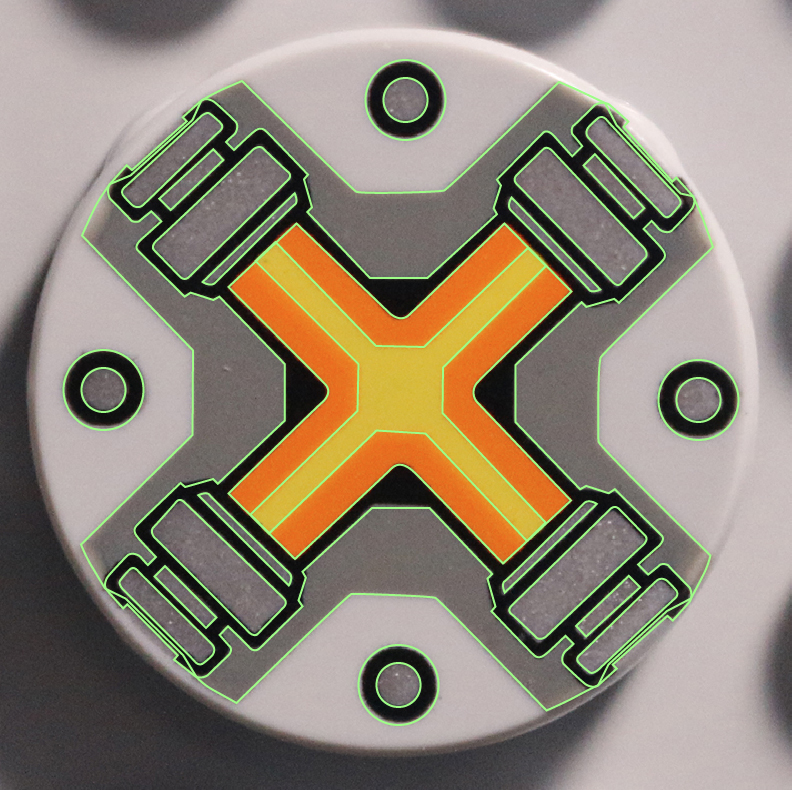
Step 3
Draw the edges in Illustrator. This step can be very time consuming if you wish to obtain a good result.
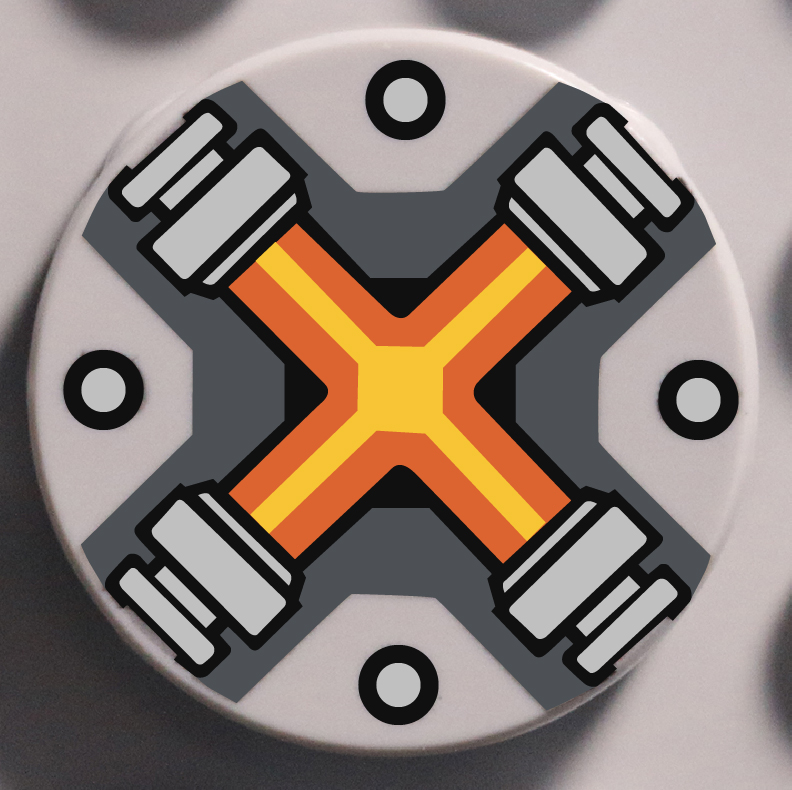
Step 4
Colour the decoration and remove the edges. Use the colour chart that you can download here to complete this task.

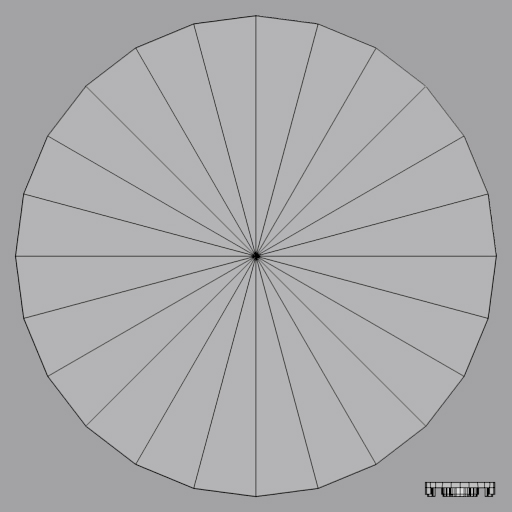
Step 5
Look for the appropriate uv map in this folder and open it in photoshop.
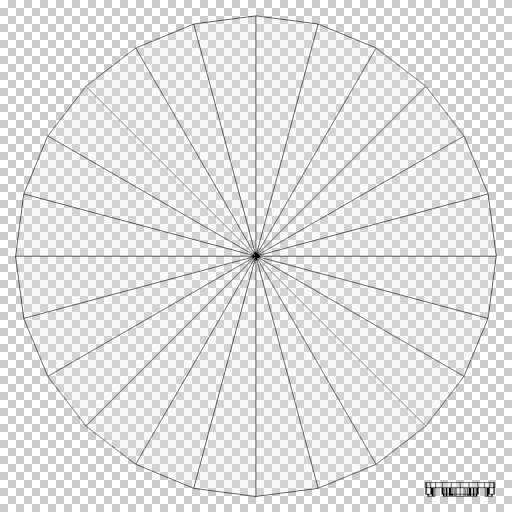
Step 6
Add a layer with the background colour using the hex value from the colour chart.
Step 7
You can create another layer and add your original image under the uv map to help scale and locate the decoration.
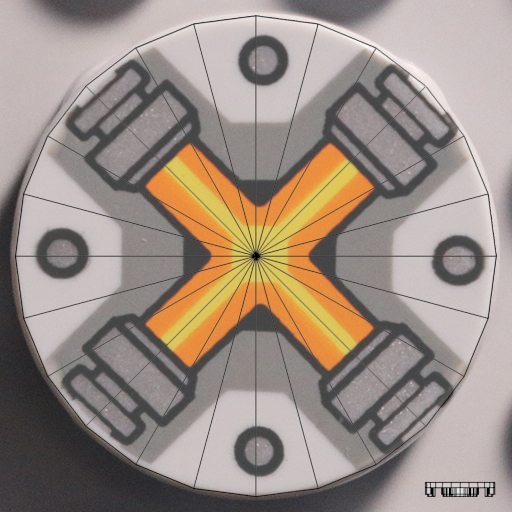
Step 8
Import you vectorized decoration as a new layer. In Photoshop I select the option Paste as Smart Object. Scale and locate it correctly on the uv map.
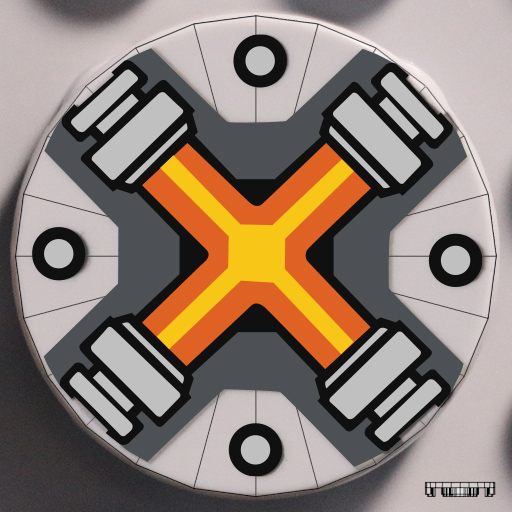
Step 9
Hide all the unwanted layers before saving it as a png file.

Step 10
Send me your decoration via email using the Contact Us link in the footer of this page. Please include the references and names from LEGO - if available - and from bricklink to make it easier and quicker for me to add. They can be found on http://brickset.com and http://www.bricklink.com
@wlange
Okay, thanks. Just wanted to know what I should know about this topic before making mistakes. 😃
And asking again:
The provided UV maps, when I have a sticker going over two parts, I need to have a sticker without seams.
So, is the sticker positioned BETWEEN the UV lines or do the V lines count for the decal too?
I mean, will there be a gap when the stickers won´t go over the UV lines?
Sorry for the bad explanation, English isn´t the best I can... 😕
TLG stickers usually don't cover multiple parts. If a sticker decoration is supposed to cover multiple parts, TLG would deliver that decoration split into several stickers. See the hood in the Gold Hunt set as an example. In this case I created the complete decoration first, and split it using a clipping mask (left half for first part, right half for the second one).
Edit: there are exceptions from that found in the 'Stickers' section.
I want to create the stickers for a TLG set where the sticker hovers one time 6 parts and the other time 3 parts.
My question is how I should handle the UV maps: Sticker inbetween the UV lines or on the UV lines as well?
Which set is that? When we see it, we can advise properly. If it contains a sticker covering multiple parts, then a new Mecabricks part (basically a plane) would have to be created for this. That would be similar to the parts in the 'Stickers' section. For this, Scrubs would have to know the sticker part number.
If you'd like to do something custom, then the way would be to create a plane on top of the parts to be covered (which would be the sticker) in Blender, UV-unwrap it and export the map for decal creation.
Hi, as per what wlange stated, stickers across multiple parts are handled as individual parts and require a mesh. See the "Stickers" part category http://www.mecabricks.com/en/parts?cat=71. I would need to know the dimension of it.
I´m NOT talking about custom stickers ( 😠)! I did my own UVs already (as in my Tiny Turbos Vignette) and started a topic in the forum complaining about the vertices being not connected to unwrap it properly, so I KNOW how to do so.
I want to make some farely easy decals for LEGO® 10241 (Easy because the Logo and Text is official and provided online as svg). There are stickers covering three parts (containers) and seven parts ("Maersk Line" at the side).
My question isn´t answered yet; should I put the texture/decal/decoration/sticker BETWEEN the UV lines (so the border of the brick is where the UV line begins) or on it too (so the border of the decoration would start directly after the UV line)?
But feel free to add the decals yourself if I´m even to dumb to ask my questions properly so they get an answer concerning the question.
If I'm getting what you're saying, you want to put them directly on the piece. In this case you'll need a new sticker piece made, but Scrubs needs to know how tall and wide the sticker is so he can do that. (Sorry I'm just repeating what's been said already.) So if you have the set, you could probably just use a some kind of measuring device to measure the stickers, but if not, you could maybe try to calculate the dimensions based on pictures and comparing it to the bricks it's on?
Set 10241 requires at least three sticker parts and UV maps for these. In this case splitting decals is not necessary.
@NGCHunter2, next time please be so kind to post all necessary details in your initial request (set/part numbers). This will help to speed up the support process and avoid misunderstandings. Thank you.
@NGCHunter2
I think your question has been answered clearly by at least 3 people. Stickers across multiple parts require a separate mesh (that will be unwrapped to be decorated) and are not drawn directly on regular pieces. I need to create it first to the dimension of the sticker. See part 8652stk1 for example.
No need to get angry. We all try to help each other.
@wlange @Scrubs
Okay, thanks.
And... I don´t know what I´m doing wrong, but my question is not understandable for anyone... 😕 I´ll try it again, with the best language I can provide:
I have two stickers in the scene covering just one part (yay!), and I can create them like all decorations on Mecabrick here. You provide UV maps at Google Drive, but I don´t know how they will be handled: There are Outlines displaying the borders of the UV; so is the decal placed between the UV lines with the UV lines as borders (like when the UV lines starts, the LEGO® part will end) or does the space the UV lines are placed on show up too (the LEGO® part ends after the UV line)?
I hope I´m able to get this question told so that someone understands it. I didn´t want to be rude, especially not to people working hard to promote high quality pieces/decorations here, I´m just a little bit annoyed that I don´t get my question across. 😦
OK, it is not always easy to be understood especially on writing form. I am sure that face to face it would be sorted in a few sec 😉 Besides, there are users with a lot of different skills and knowledge - none or advanced - and it is always hard to know people levels to adapt the answer.
The lines on the png files from my google drive have been made by exporting the uv map layout using my raw Blender files which look a bit different to the parts you export from Mecabricks. Generally I only lay properly the area of the part that can be decorated - I don't waste my time unwrapping the weird area that will never be decorated (I just make a projection of the view and scale it down to put it in a corner).
Just draw within the outlines that represent the edges of the unwrapped areas. However, for the finish decoration, you need to hide these lines. There are only a guide to draw. As an example, download a decoration file from mecabricks and overlay the corresponding uv map on the top. It will give you an indication of what is what on the uv map. Everything which is outside these areas is not part of the brick. So you can put anything you want and it will not appear anywhere on the part. I generally leave it the same colour as the background.
Hope you will find your answer in the middle of all of that
@Scrubs
Yup, thanks alot! 😉
I would personally rate my Blender skills (if we are NOT talking about video editing with real footage and things like that) with a 2.5-3 of 10 (0=worse/10=best).
I did UV unwrapping a lot, but had never the issue that I need to be 100% exact, so that´s why I asked. 😁
I´ll e-mail you two decorations today for sure, and I´m working on the scaling thing right now.
What should I do if the part neither exists in the Bricklink list nor on Brickset?
Bricklink just listed the sticker sheet itself, and I personally don´t own the set, but found some 200%FullHD pictures for scaling, so that´s the only "reference" I can provide in the e-mail as - what did you say? - "references and names from LEGO". Would that be okay?
(Nah, talking way too much)
If it is not referenced in any, just give me the set number like you did. This with the part design is enough for me.
Hi Scrub,
Any way to test the decoration before sending it to you? I can think of doing UV mapping in blender for the concerned part with the new sticker image, is that the right approach?
Of if it aligns with the UV maps you have shared it is good enough?
Thanks
Istaka Citi
Hello,
If it aligns with the existing uv maps it shall be good enough. I only try them before for complicated pieces with rounded surfaces. For others like minifig torsos, flat tiles, etc. it goes straight to Mecabricks.
If you really want to try, you can export a similar part with a random decoration and replace the image file with yours in Blender.
Hi!
I´m trying make my first decorations and I just wonder about the sticker edge that is visible on some parts(i.e. 87079d93.png)? How is this made and why is it on some but not all sticker decoration parts?
//Sea
The edges you see around stickers are a bump map, which looks like this:
http://www.mecabricks.com/assets/parts/maps/bump/87079dXX_bump.png
The sticker area shall be white (#FFFFFF), the area around it black (#000000).
Ahaaa, ok I get it now!
Is there an collection of the bumpmaps like the UV maps(google docs), I mean the bumpmap must be the same for all decorations for the same part, in this example 87079, right? Or is the bumpmapping handeld by you guys(the experts!) after mailing the decorations?
If I could have a already made bumpmap I can just add it as a layer in Gimp to place the decoration even better/same as other decorations?
No, there isn't a collection, but you may re-use your own bump maps. In the above example I named it 87079dXX_bump.png, as I used it for multiple 87079 parts, hence the XX in the file name.
LEGO, the LEGO logo, the Minifigure, and the Brick and Knob configurations are trademarks of the LEGO Group of Companies. ©2026 The LEGO Group.
Mecabricks, the Mecabricks logo and all content not covered by The LEGO Group's copyright is, unless otherwise stated, ©2011-2026 Mecabricks.