A new part system is currently being implemented in Mecabricks and the public section of the specification related to decoration is being described below.
The previous revision presented in this thread is now obsolete and shall not be used anymore unless you are a decoration admin in which case both versions shall be uploaded during the transition period.
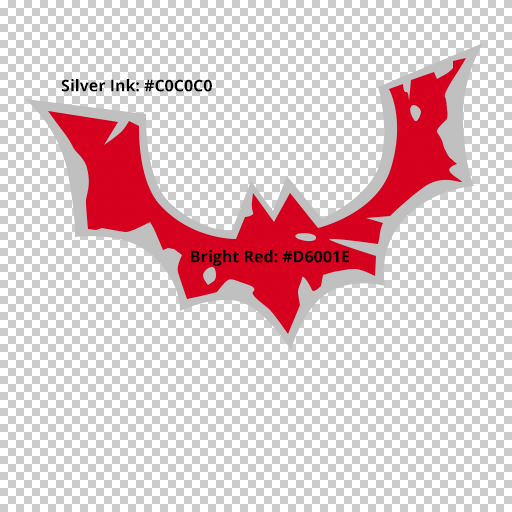
Color Textures
This texture type is compulsory. It shall only include the printed areas as well as the stickers. The background shall be fully transparent as the base material(s) (e.g. solid, speckle, metal, etc.) can be set independently in the workshop using the material selector.
The transparent areas of stickers printed on a transparent base is ignored on this texture.
Only colour values from the Mecabricks colour chart shall be used for a full support on all Mecabricks applications.
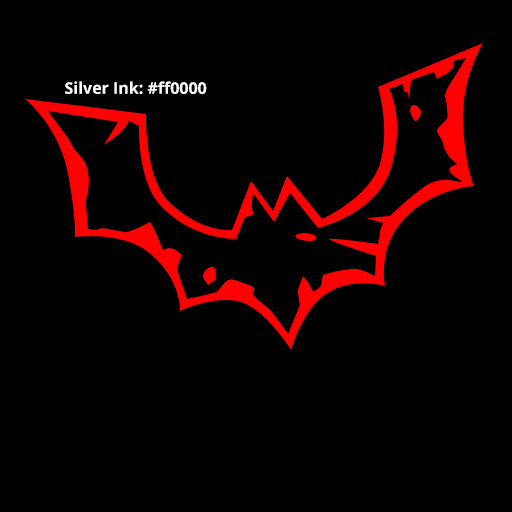
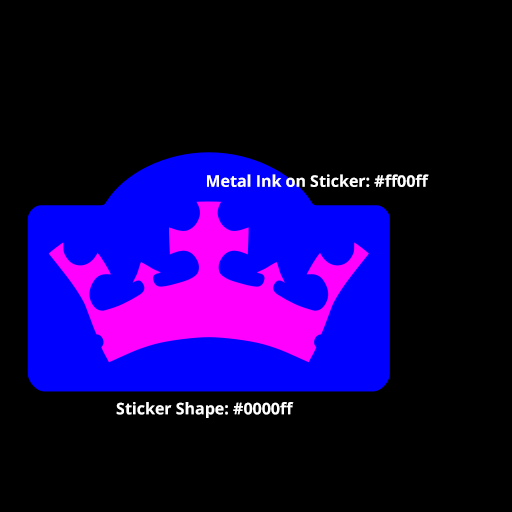
Data Textures
This texture is required for stickers or if the printed areas include metal inks.
This is a non-colour image texture. Data contained in the 3 channels is:
Red: Metal ink for printed areas or for stickers (Materials 334, 335, 336, 337, 344 and 345)
Green: Chrome ink for stickers
Blue: Sticker shape

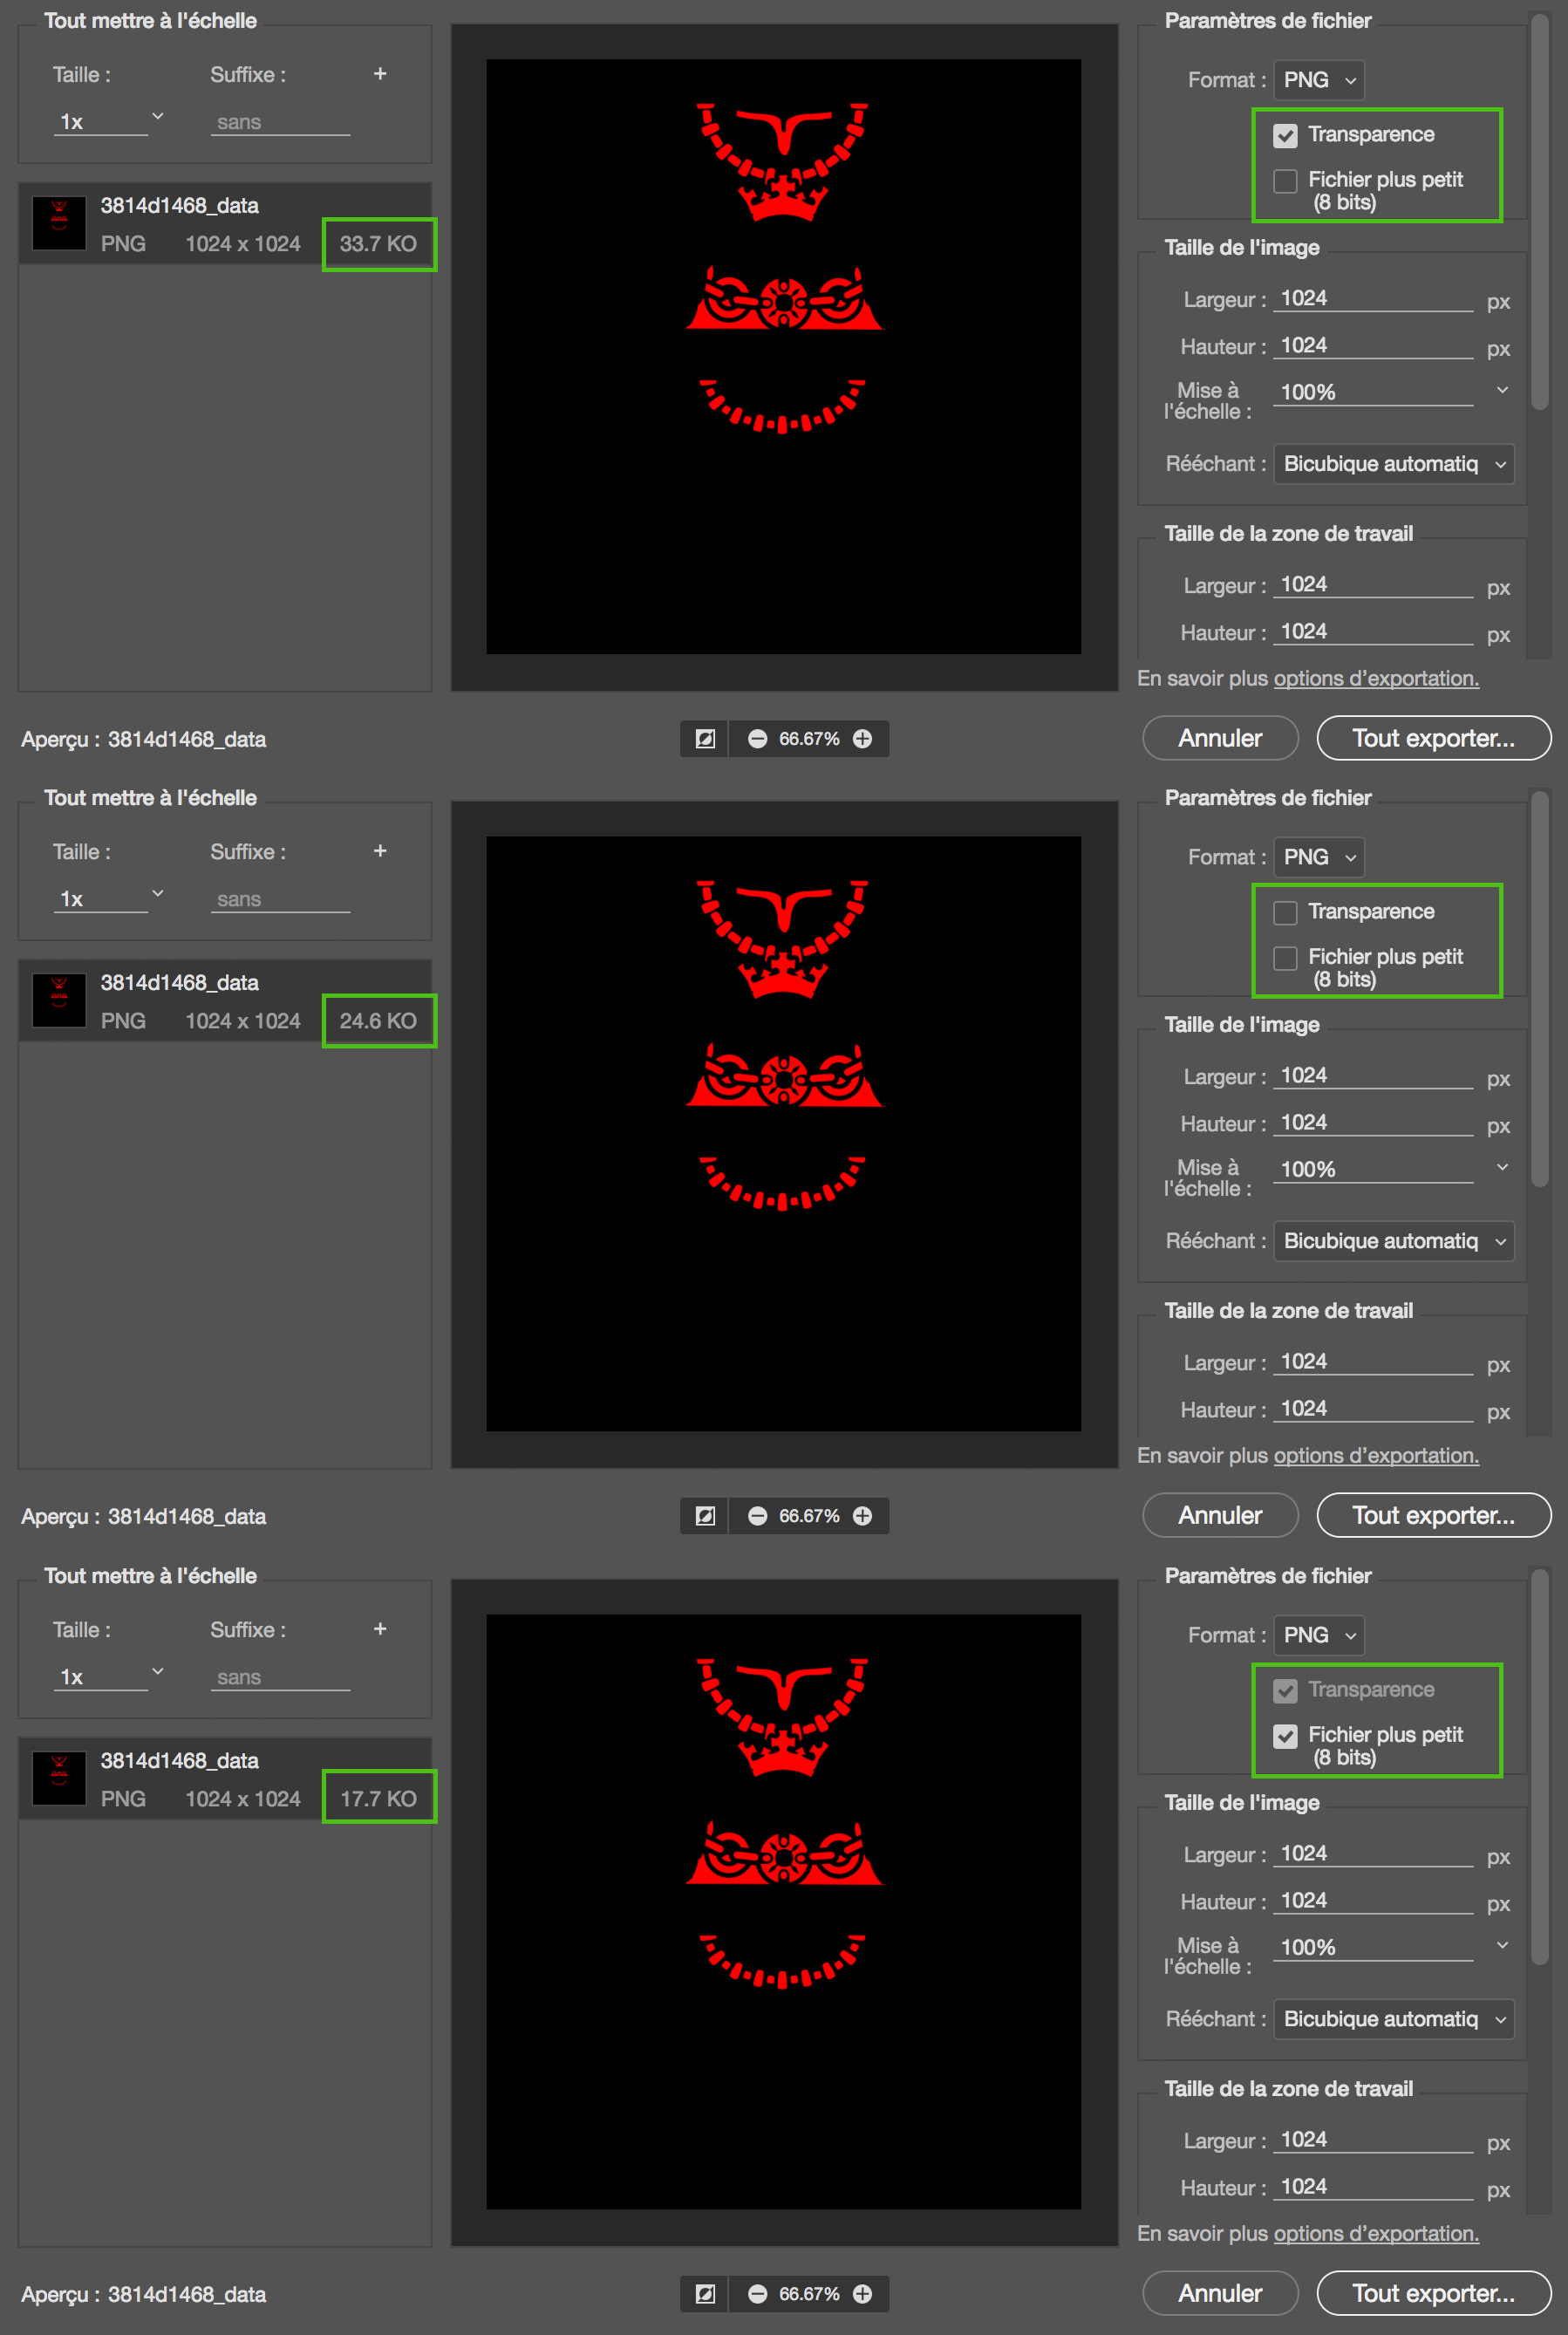
File size optimisation
Color and Data textures can be optimised in order to reduce the file size. You shall save your textures as PNG-8 (8bits per pixel - 256 colours). It will often divide the size by two.
Some software like Affinity Designer struggle with PNG-8 and transparency so make sure that your software handles this format properly first.
Tinypng does a very good job.
@Operator011 This is not a thread to request parts. Please use https://www.mecabricks.com/en/forum/topic/50
@Scrubs: Okay, thanks. I couldn't find it before.
So, can people like me make custom parts? How?
@194jj01: Yes. You can.
@194jj01: Here is the vid RubricksCube made. I found it EXTREMELY helpful. https://www.youtube.com/watch?v=IT-45w5oRY4&t=90s
Do you have to download anything?
@Scrubs: For the insufficient storage space, is there a way to get more storage and therefore hold more prints?
How do I upload a file to use it here?
NVM. I have a bigger problem - literally. My image is the wrong size? I'm not sure, but I think the Stud.io method is easier to use (objectively)
I just want to put together a minifig - I have all the colours correct already, I'm just trying to figure it out.
Do you have a template or something?
@PyrokineticNinjaMaster, download the UV-map with the correct size from the partmanager.

You see the correct resolution(1024x1024 for 3814) for each configuration and can download all UV-map for parts that have been converted to the new system. You can find all converted parts under the "Configurations" cogwheels in the left menu(second below #1 in the picture).
If you have any more questions, just ask!
Okay, I have a question, how do you insert images? For some reason I just can't figure out how to do it.
Cool, thanks!
(EDIT: Replying to Sealund)
@Operator011, click on the plus icon.

This is a good tutorial made by our Mecabricks GOD himself, @Scrubs to show how to add custom parts.
[youtube]wzOnoN9Iv-w[/youtube]
Thanks, but I meant inserting images into text. I can do the links, but how do I comment an image?
@Operator011, check this out:https://www.mecabricks.com/fr/forum/topic/275
So, I tried it, and it didn't work... I'm using the chrome browser, on a chromebook, maybe that's the problem? I was able to do the "Inspect" (Ctrl, Shift, I for me) But I couldn't find the line that he was talking about.
Hmm what are you trying to link?
Edit: it might be best if we discuss this in the linked forum so we do not spam the decorations forum😉
Easiest way is to use imgur och flickr, I use Imgur and just copy/paste the BBcode for the image.

I would like to put a sticker on a part but the 3d rendering is not available.
How can I do it please?
(part no.6239) and (64394 and 64680)
LEGO, le logo LEGO, la minifigurine et les configurations des briques et tenons sont des marques déposées de LEGO Group of Companies. ©2026 The LEGO Group.
Mecabricks, le logo Mecabricks et tout le contenu non couvert par les droits d'auteur du groupe LEGO sont, sauf indication contraire, ©2011-2026 Mecabricks.