Blender Motion Blur - tutorial
Example
Yesterday I tried for the first time motion blur in Blender - Stratoplane "The Bumblebee" by RuMontag

Well, I want to show you how to do this with a short tutorial.
If someone has a better method, please tell us!
Step 1 - the scene
Open your Blender template and set your scene (camera, lights, environment texture or what you want 😛 )

Step 2 - camera setting
Open the render palette and activate Motion Blur option.
You'll see the Shutter value: it goes from 0.01 to 2.00 - the more the value is high, the more the image will be blurred.

Step 3 - open the Timeline
Step 4 - select the object
You'll select the piece you want to move by right clicking on it. You'll see an orange outline!

Step 5 - object settings
We want to rotate our propeller around the Z axis - you may have to choose the X or Y axis, depending on how your piece is oriented 😉
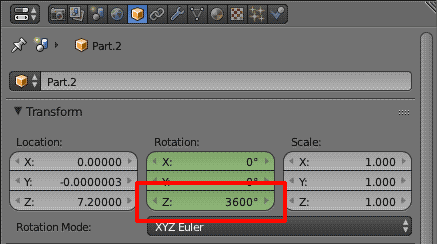
Go to the object palette:

As you can see, from this palette you can change position, rotation and size of the selected piece. In our case we are interested in changing rotation.
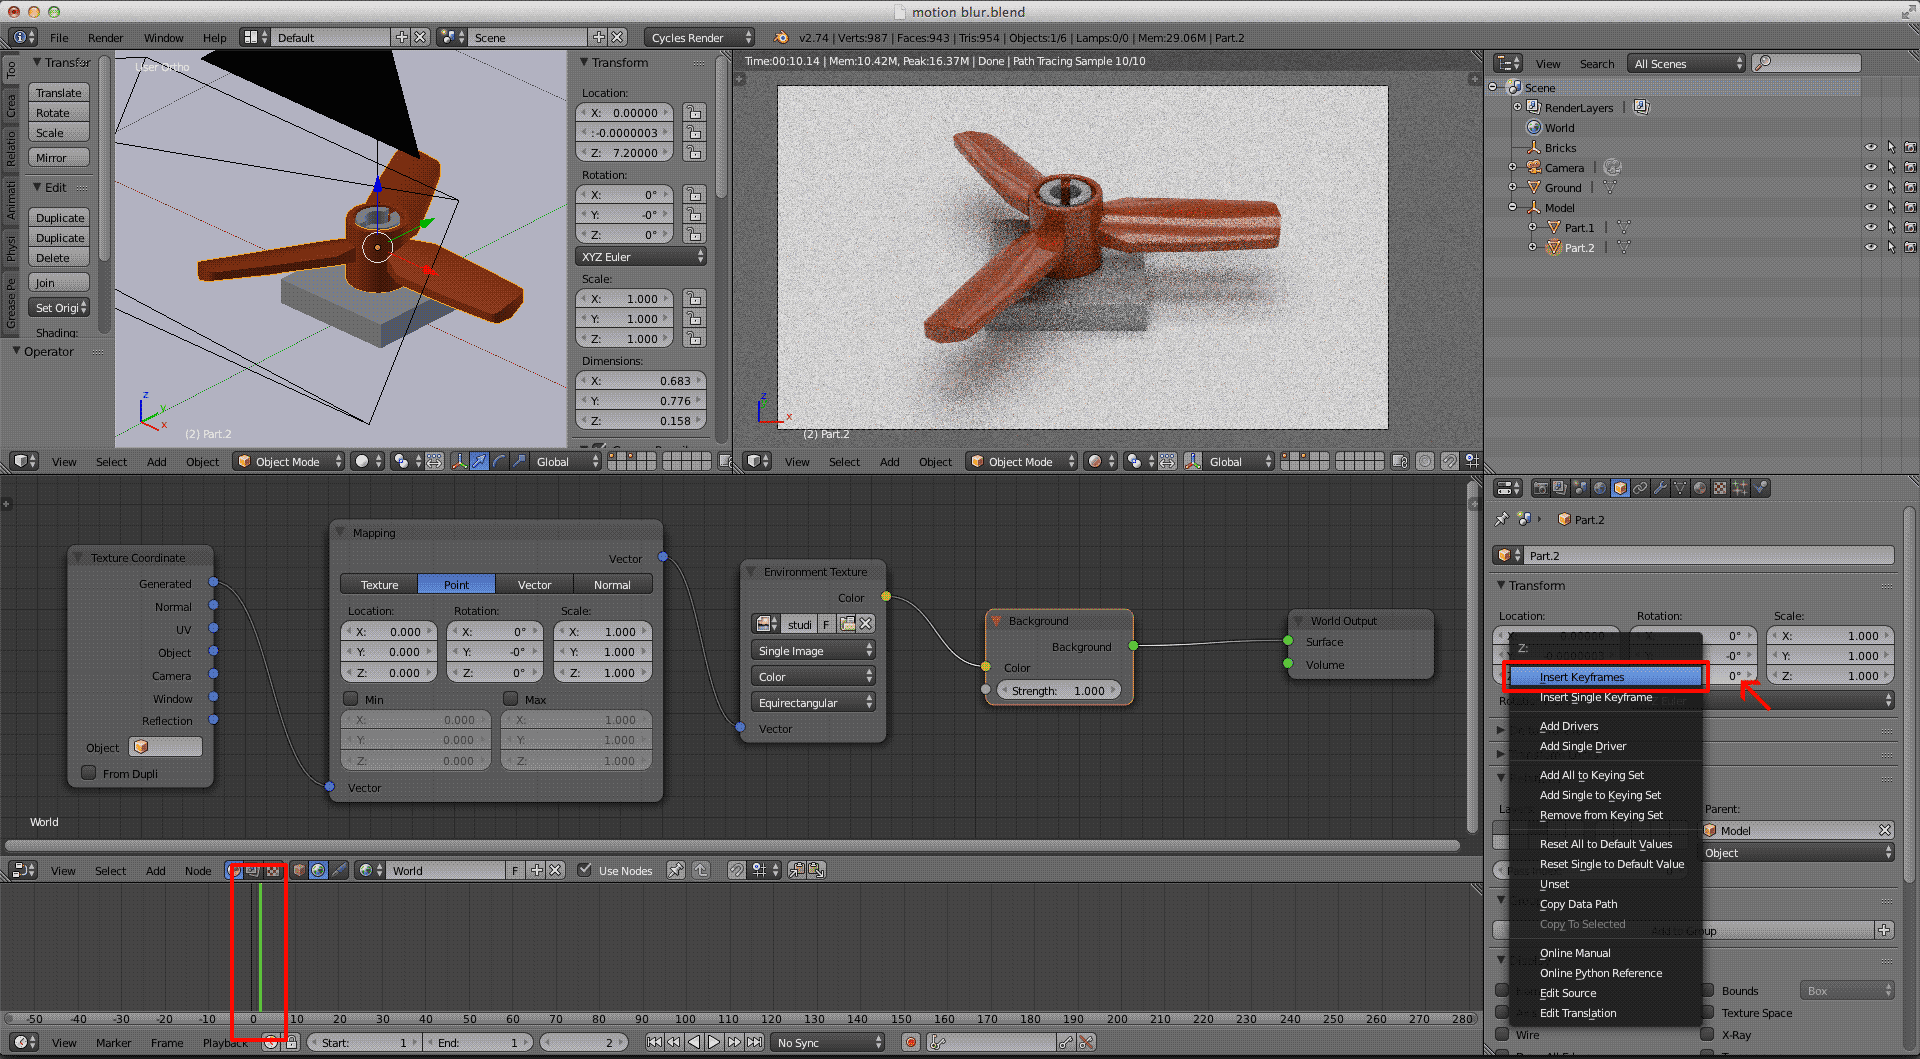
Now, make sure that the green bar of the timeline is on the instant zero, then right click on the Z axis value and select insert keyframes.
The box will turn yellow.

Move the green bar to the right (I put it on 30). Have you seen that the xyz rotation table has become green?
Write the value you want (I put 3600, it means that in 30 frames will make 10 rotations), then right click and insert keyframes.

When you have done, you'll see two yellow keyframes on the timeline. If you move with the green bar, the propeller will move!

Step 6 - render
Put the green bar between your keyframes and render 😃
Considering that you'll need to make some attempts to get the effect you want, I advise you to do some fast render (low quality) or only render part of the scene.

Step 7 - less or more blur
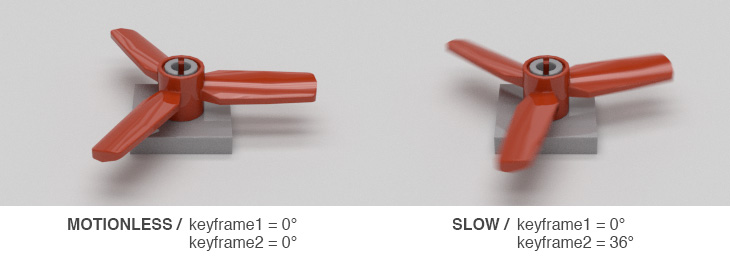
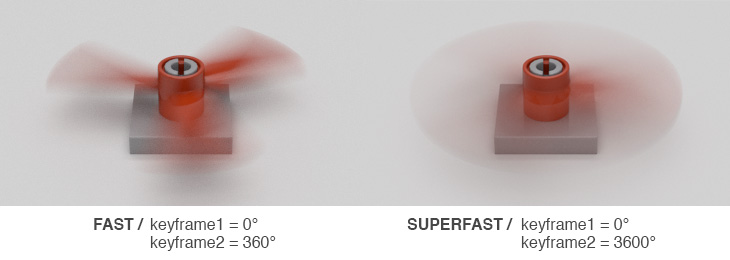
If you want to blur even more your object, increase the second keyframe's rotation. To change a keyframe put the green bar above it and increase the value in the box. Right click and Replace keyframes.
On the contrary, to slow it down. You can also reduce blur by decreasing Shutter value (render palette > motion blur > shutter).
Here are some examples! 😉


Could you update the tutorial to 2.8? Some things work differently now, and I can't figure it out.
I have a couple of questions:
- How do you do this for multiple parts at once? (i.e. a small build)
- How you do it along a local axis instead of global?
- Is there anything major that's different with transformation instead of rotation? (aside from using the transform tables)
Thanks a lot, hoping for a quick answer! 😛
Hope this helps.
2. For example, when doing local X axis, press the X key twice.
- You can create an Empty object, and set it as the parent of all the parts in the build. Then rotate the Empty.
- Not that I know of!
Hopefully this is helpful. If anyone has anything else to add, feel free to do so.
LEGO, le logo LEGO, la minifigurine et les configurations des briques et tenons sont des marques déposées de LEGO Group of Companies. ©2026 The LEGO Group.
Mecabricks, le logo Mecabricks et tout le contenu non couvert par les droits d'auteur du groupe LEGO sont, sauf indication contraire, ©2011-2026 Mecabricks.

