This document is partially outdated. Please refer to this thread for up to date information.
This is not always easy to find the right files to create decorations for minifigures. Therefore I decided to create this topic to give more advice and track any changes that will be made.
All uv maps are available on my public drive.
## Heads
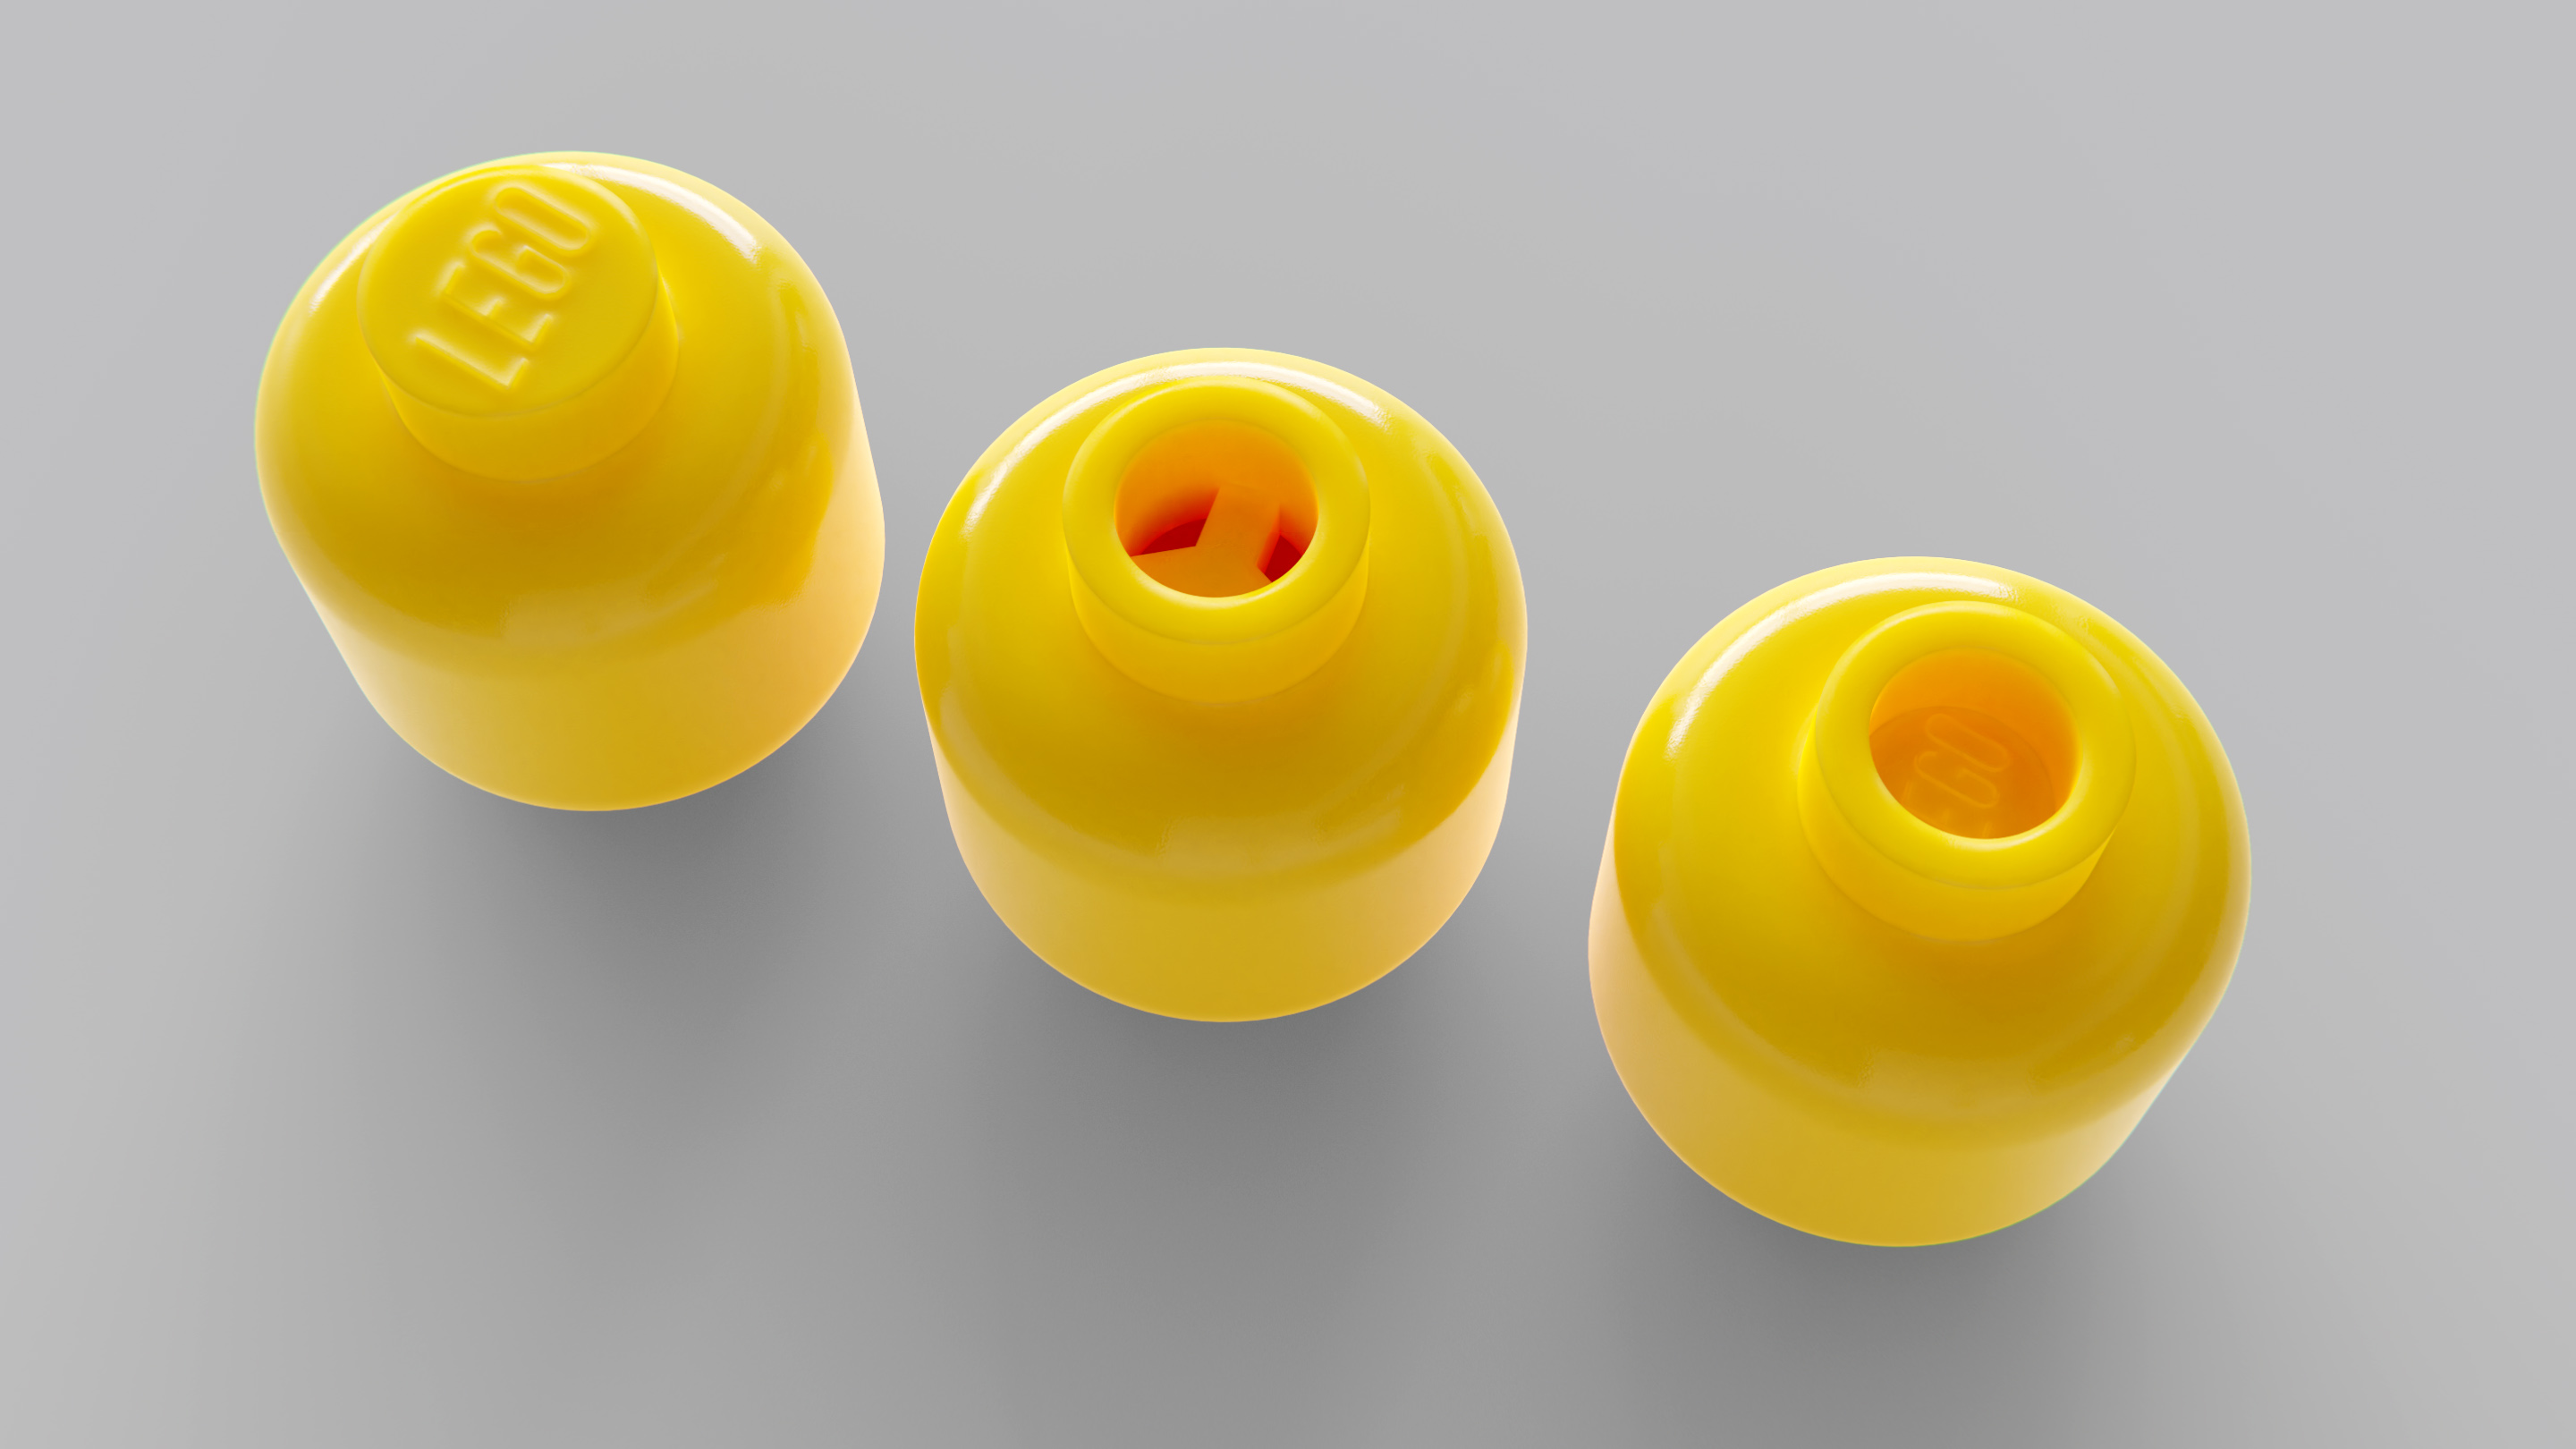
Three moulds are available:
- The original version with a solid stud. It has been in use until the mid 1980s. The reference on Bricklink starts by 3626a.
- The next version with an open stud blocked by a 3-branch star. This version has been retired from LEGO sets in the early 2010s. The reference on Bricklink starts by 3626b.
- The current version with a hollow stud. The reference on Bricklink starts by 3626c.
For the original version, only one uv map is available. The name is 3626v3uv. This is a projection from the front and the back. At that time, heads were pretty simple and never printed all around. Make sure that you do not draw outside of the red areas otherwise, the decoration will leak on the edges.
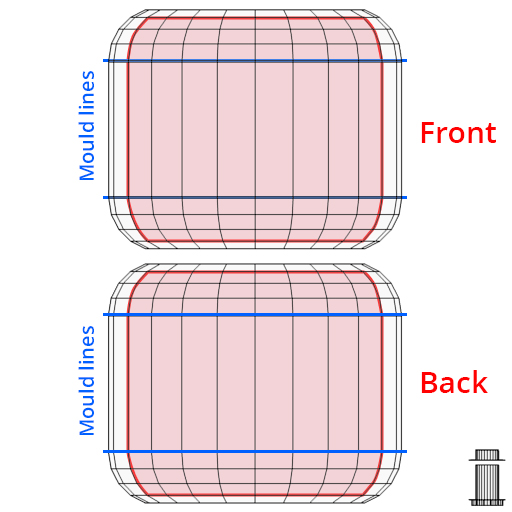
For the two most recent versions, the same uv maps are also available. the names are 3626v2uv2 (hollow stud) and 3626uv3 (blocked open stud). In addition, a second version has been made to allow the creation of heads printed all around. The names are 3626UV2 (blocked open stud) and 3626v2uv (hollow stud). This is an unwrapped version with a seam on the right hand side. This one is more complicated to use as you have to imagine a flattened cylinder.
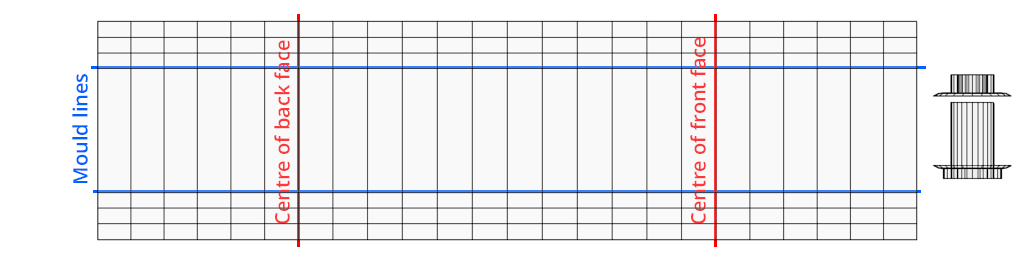
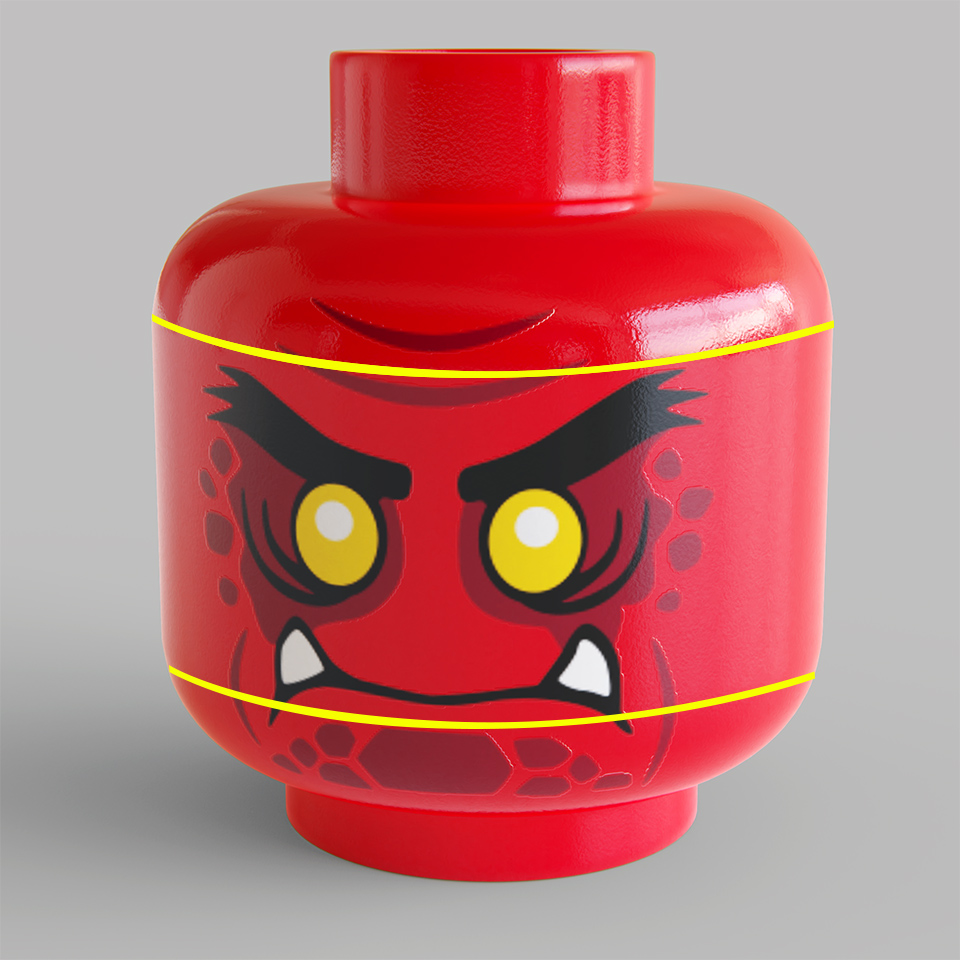
The best solution when scaling and positioning the decoration on any of the uv maps is to use the top and bottom mould lines as references.
File resolution shall be identical to the uv map png file available on the mecabricks public drive.
## Upper Body
The elements of the upper body assembly that can be decorated include the torso and the two arms. Most recent arms can be dual moulded however the shape is identical and therefore they do not have separate uv maps.
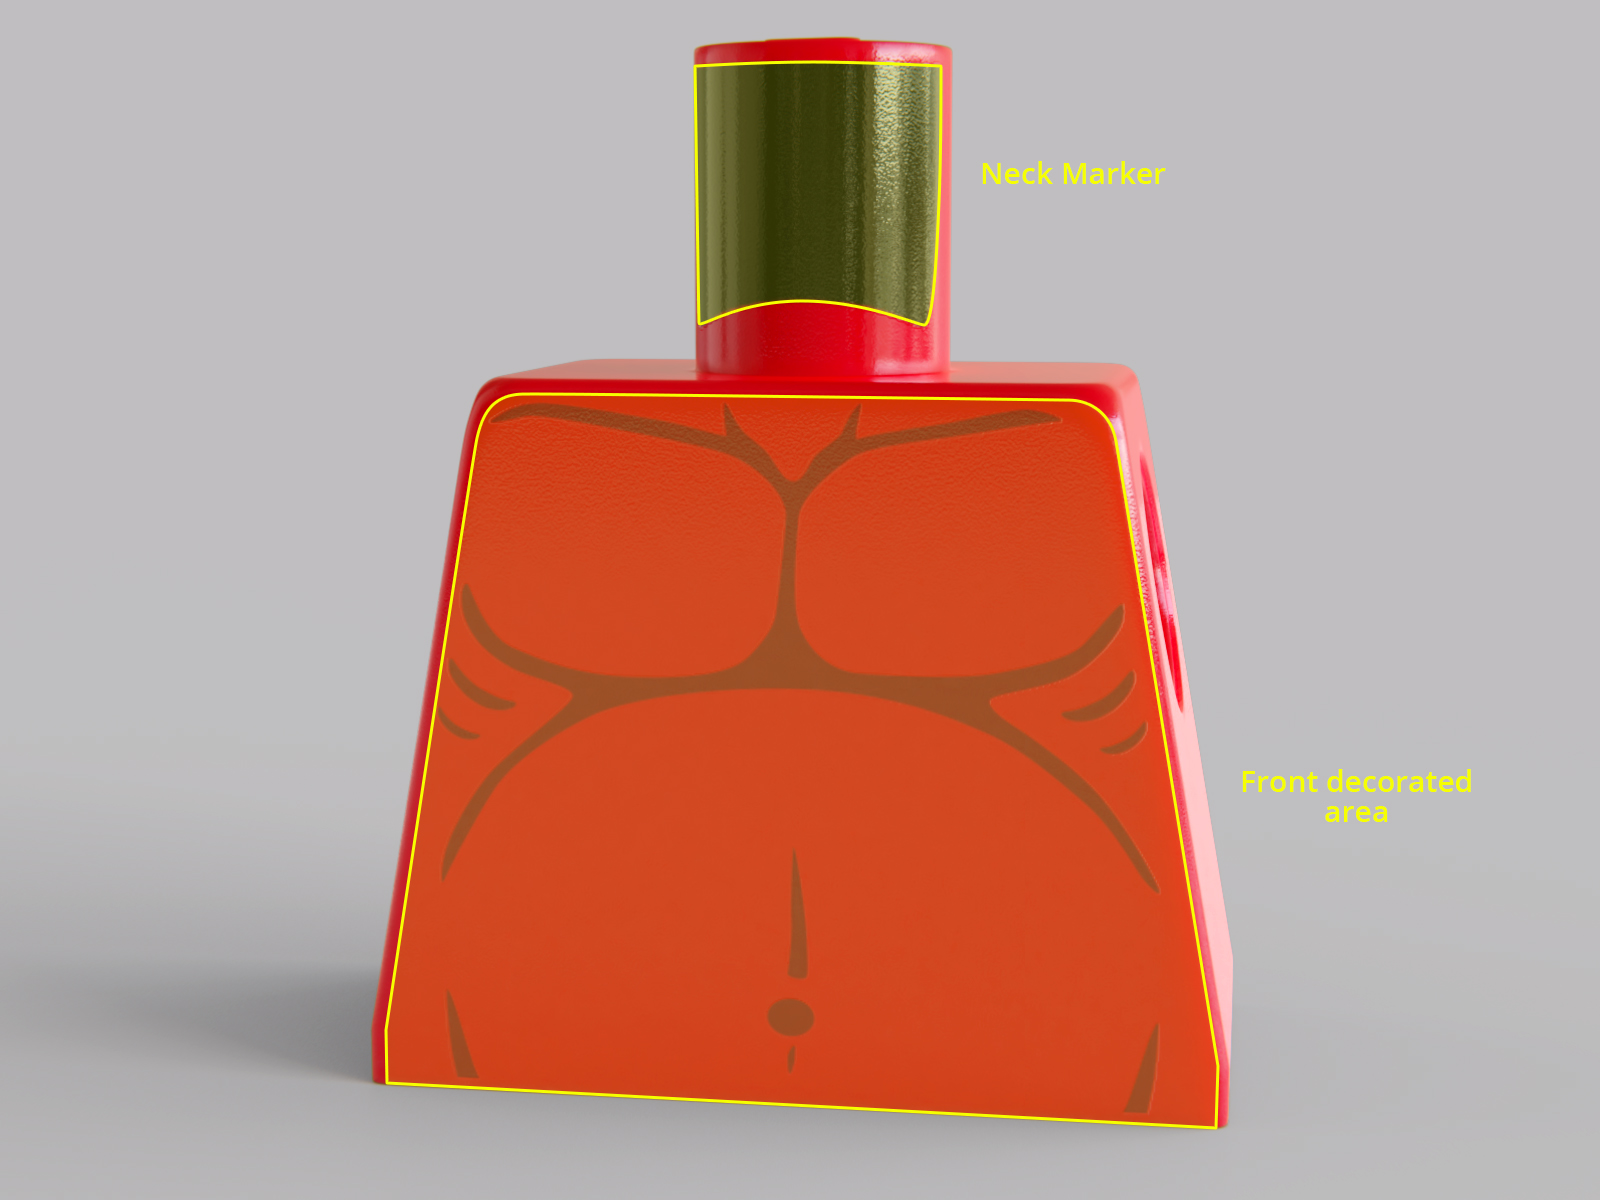
## Torso
The uv map currently in use for the torso is 3814uv.
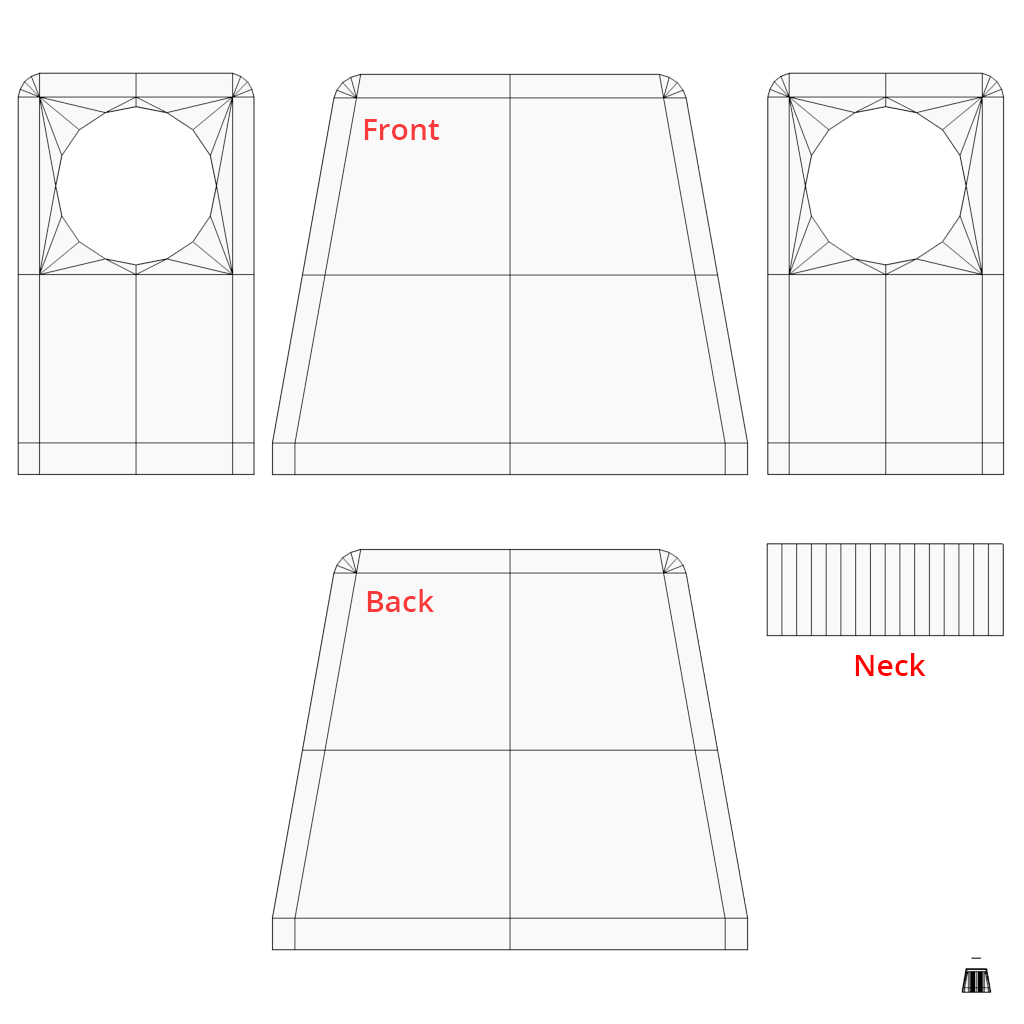
The back and front shapes represent the flat areas and do not include the bevels. This is something to keep in mind when scaling and locating the decoration. The neck marker can only be black (MB #010101) or white (MB #f4f4f4) or not present at all like on the collectable minifigures.
Templates for Photoshop and Gimp are available for download:
https://www.mecabricks.com/docs/forum/uvmaps/templates/3814uv.psd
https://www.mecabricks.com/docs/forum/uvmaps/templates/3814uv.xcf
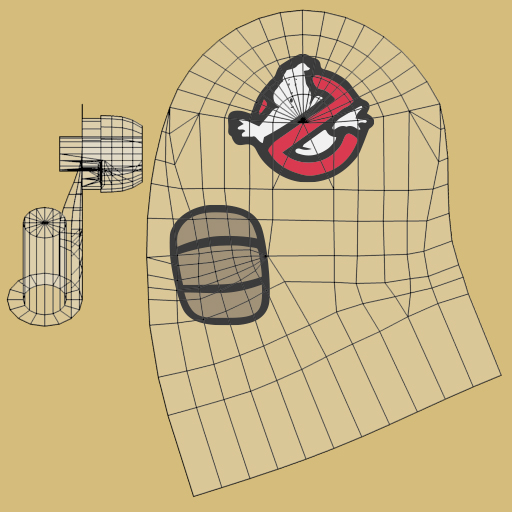
## Arms
Two uv maps are available for each arm. The first version 3818v2uv and 3819v2uv is a projection from the side. This is the easiest to use but it is not possible to recreate the most intricate designs. For these cases, there is another version 3818v2uv2 and 3819v2uv2.
For 3818v2uv and 3819v2uv, ensure that you do not draw outside of the red area. If you do so, the decoration will leak on the edges.
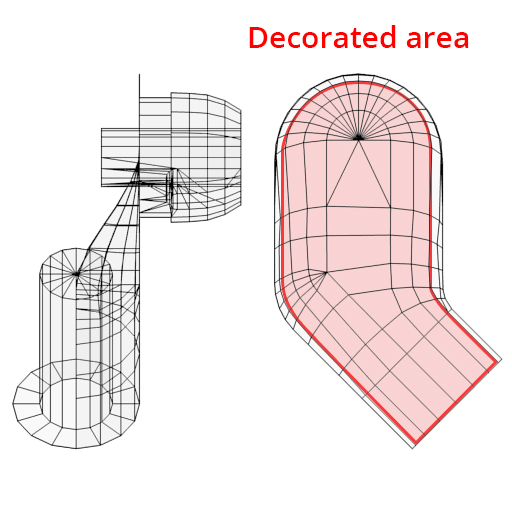
The second version named 3818v2uv2 and 3819v2uv2 is more complicated to handle. You may have to use texture painting in your preferred 3D package to ensure that the decoration is properly located, scaled and not skewed.
Templates for Photoshop and Gimp of all uv maps for dual-moulded arms are available for download:
https://www.mecabricks.com/docs/forum/uvmaps/templates/3818v2uv.psd
https://www.mecabricks.com/docs/forum/uvmaps/templates/3819v2uv.psd
https://www.mecabricks.com/docs/forum/uvmaps/templates/3818v2uv2.psd
https://www.mecabricks.com/docs/forum/uvmaps/templates/3819v2uv2.psd
https://www.mecabricks.com/docs/forum/uvmaps/templates/3818v2uv.xcf
https://www.mecabricks.com/docs/forum/uvmaps/templates/3819v2uv.xcf
https://www.mecabricks.com/docs/forum/uvmaps/templates/3818v2uv2.xcf
https://www.mecabricks.com/docs/forum/uvmaps/templates/3819v2uv2.xcf
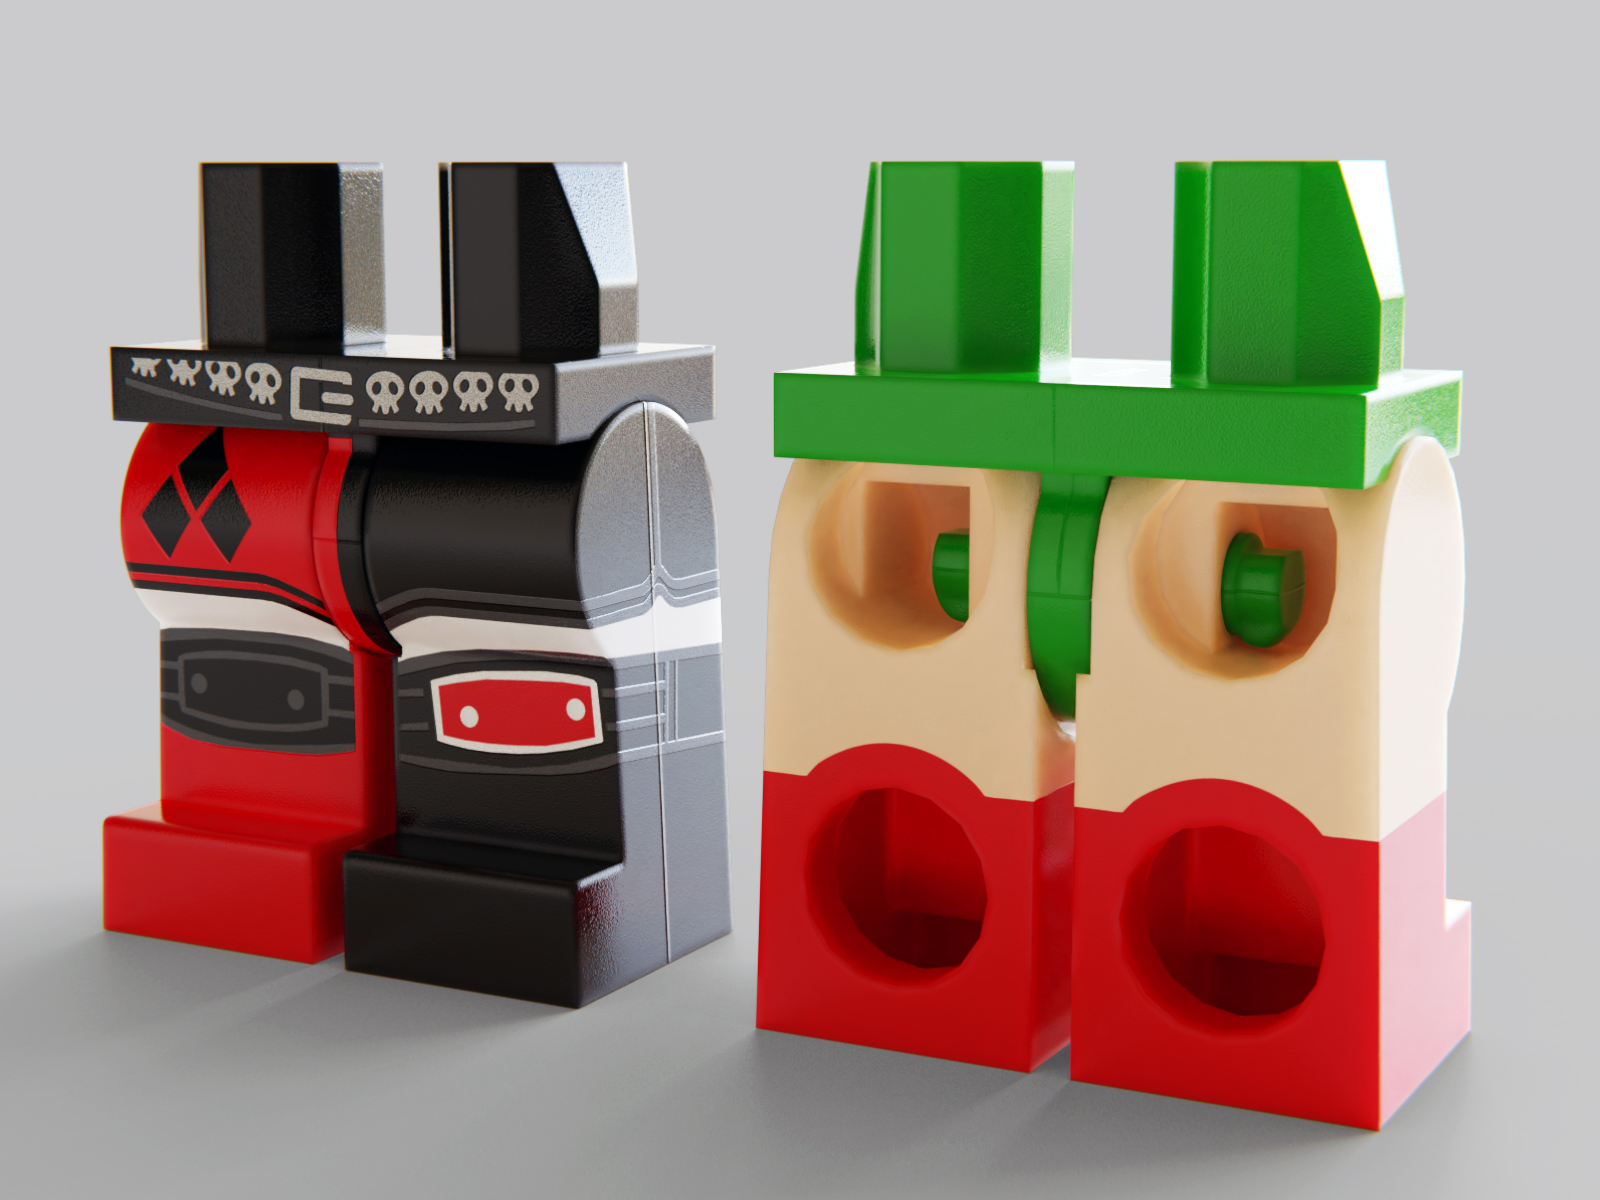
## Lower Body
All three elements of the lower body assembly can be decorated including the hip, right leg and left leg.
## Hip
The uv map currently in use for the hip element is 3815uv3.
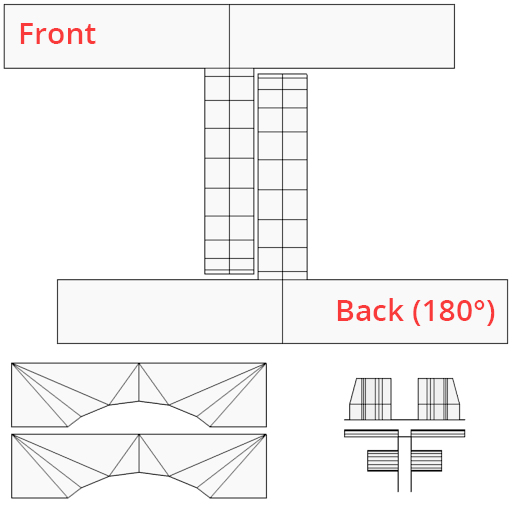
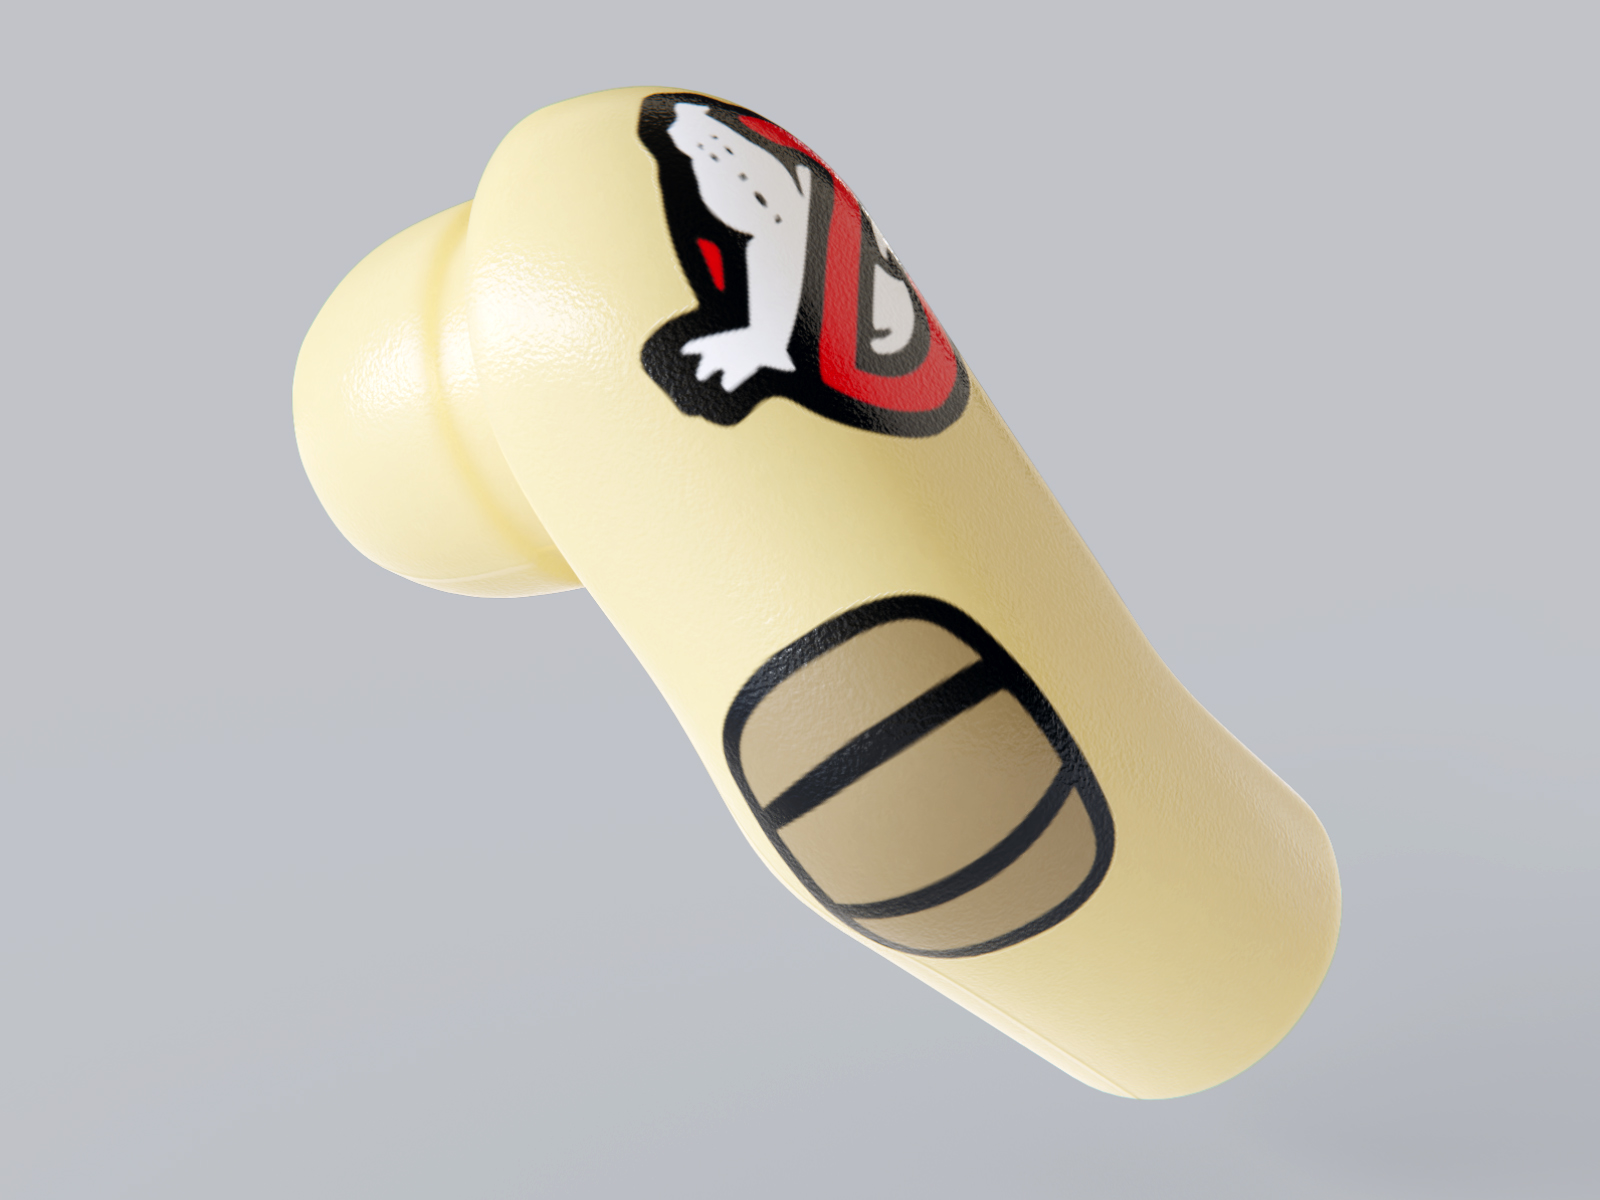
## Legs
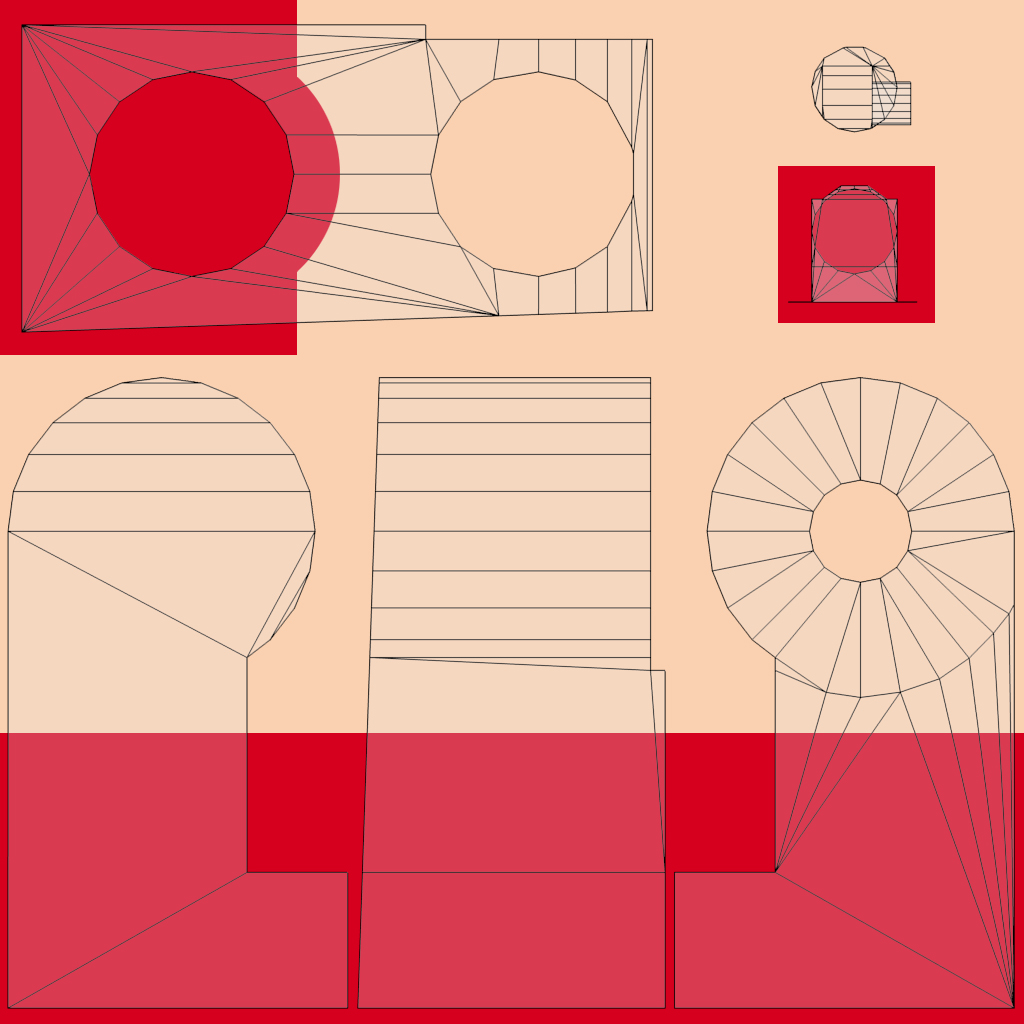
Uv maps for common legs are named 3816uv4 and 3817uv4. LEGO only prints on the front and external side. These two areas are orthogonal projections and therefore you shall keep your decoration within the limits.
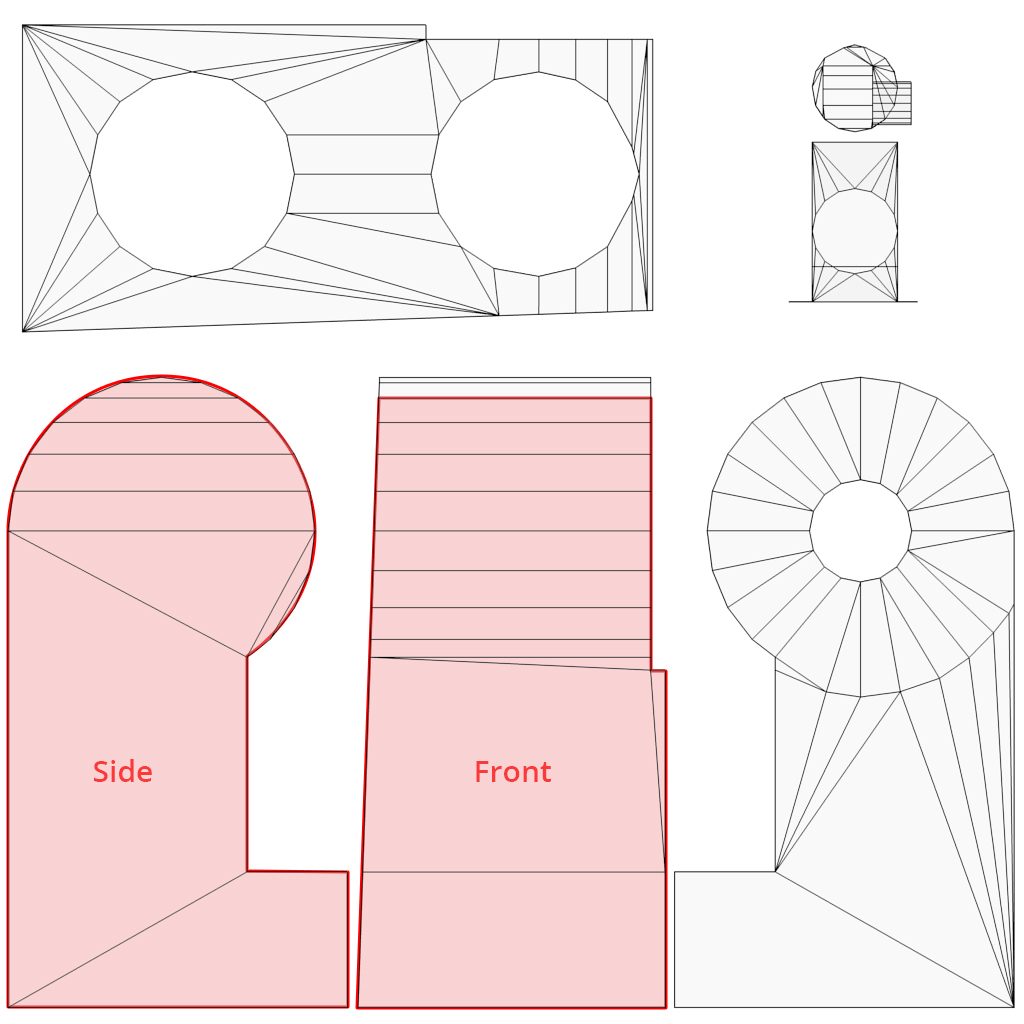
Dual-moulded legs are slightly different from their single material siblings and therefore they have dedicated meshes and uv maps called 20932uv2 and 20926uv2. I created special templates for Photoshop and Gimp that you shall use to ensure everybody has the same border between both materials.
They are available here for download:
https://www.mecabricks.com/docs/forum/uvmaps/templates/20926uv2.psd
https://www.mecabricks.com/docs/forum/uvmaps/templates/20932uv2.psd
https://www.mecabricks.com/docs/forum/uvmaps/templates/20926uv2.xcf
https://www.mecabricks.com/docs/forum/uvmaps/templates/20932uv2.xcf
I am always putting off my first mini-fig decoration, this is great motivation 😃
Thank you for this, it is really helpful. I had been having a lot of trouble with the edges of the printed areas of parts, and with the location of the different materials for dual moulded parts, and the templates look like they will be really useful.
Can you please create copies of these templates for Inkscape?
Thanks a lot! I got some new information)
How to use custom decorations?
@Andruha656, you aren’t able to put custom decorations directly into the workshop, however you can still use them by exporting the model to blender or another 3D program and replacing the mecabricks decoration with PNG files of your own.
Ok, thanks.
Could you consider making UV Maps for the medium-short legs of this part?
https://www.bricklink.com/v2/catalog/catalogitem.page?P=970cm00
How can I change the uv ?
I recently acquired the high poly minifigure and to my surprise, I see that the UV edition is very different from the Low Poly character. Is there any solution to this? Since I imagine that many of you have acquired the model.
Hello ricardoalzate,
This minifigure includes multiple uv layers including some that are the same as the models found on Mecabricks. Which version of the mesh do you use? .blend, .obj, .dae?
i'd like to import designs for a torso which covers also the sides of it (where the arms enters it), but the uv map available in the part section only covers the front and back, how do i change the uv for the one you shared here ( 3814uv) ?
mis propias impresiones puedo hacer si o no
wheres the front on the image for part manager head?
LEGO, the LEGO logo, the Minifigure, and the Brick and Knob configurations are trademarks of the LEGO Group of Companies. ©2026 The LEGO Group.
Mecabricks, the Mecabricks logo and all content not covered by The LEGO Group's copyright is, unless otherwise stated, ©2011-2026 Mecabricks.