Blender Motion Blur - tutorial
Example
Yesterday I tried for the first time motion blur in Blender - Stratoplane "The Bumblebee" by RuMontag

Well, I want to show you how to do this with a short tutorial.
If someone has a better method, please tell us!
Step 1 - the scene
Open your Blender template and set your scene (camera, lights, environment texture or what you want 😛 )

Step 2 - camera setting
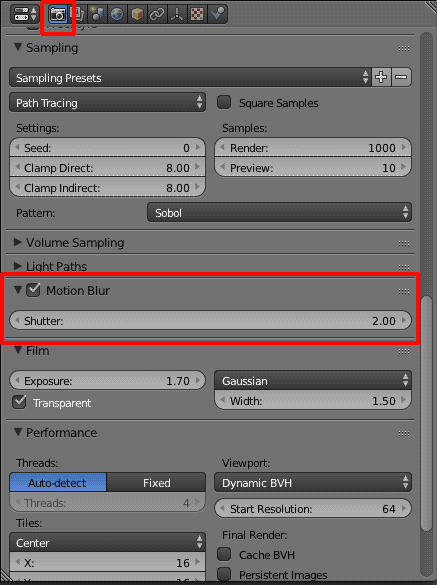
Open the render palette and activate Motion Blur option.
You'll see the Shutter value: it goes from 0.01 to 2.00 - the more the value is high, the more the image will be blurred.
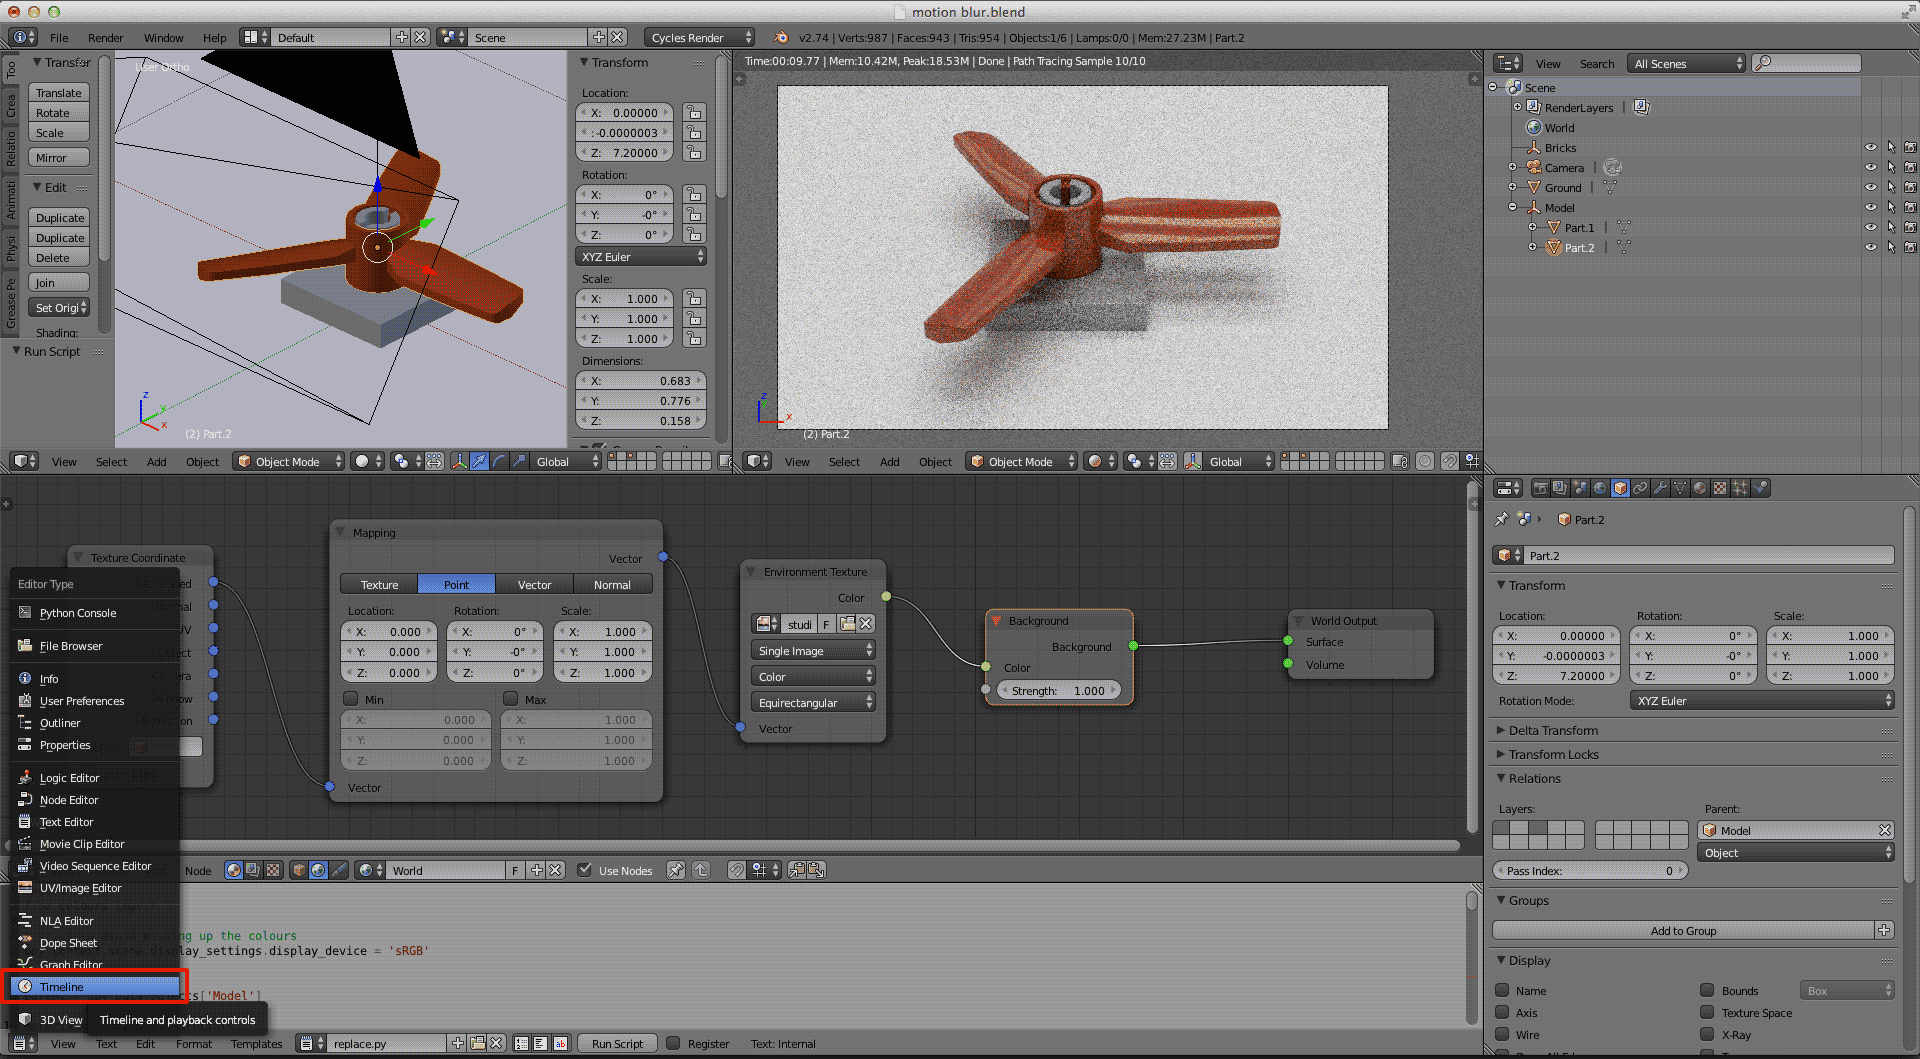
Step 3 - open the Timeline
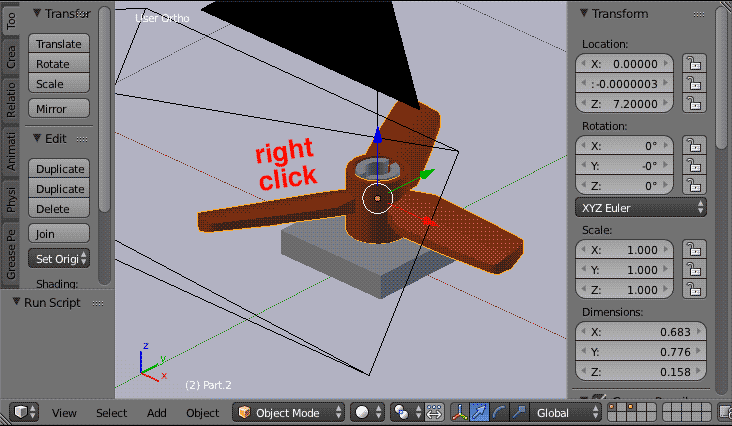
Step 4 - select the object
You'll select the piece you want to move by right clicking on it. You'll see an orange outline!
Step 5 - object settings
We want to rotate our propeller around the Z axis - you may have to choose the X or Y axis, depending on how your piece is oriented 😉
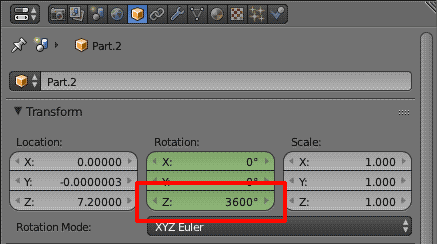
Go to the object palette:

As you can see, from this palette you can change position, rotation and size of the selected piece. In our case we are interested in changing rotation.
Now, make sure that the green bar of the timeline is on the instant zero, then right click on the Z axis value and select insert keyframes.
The box will turn yellow.
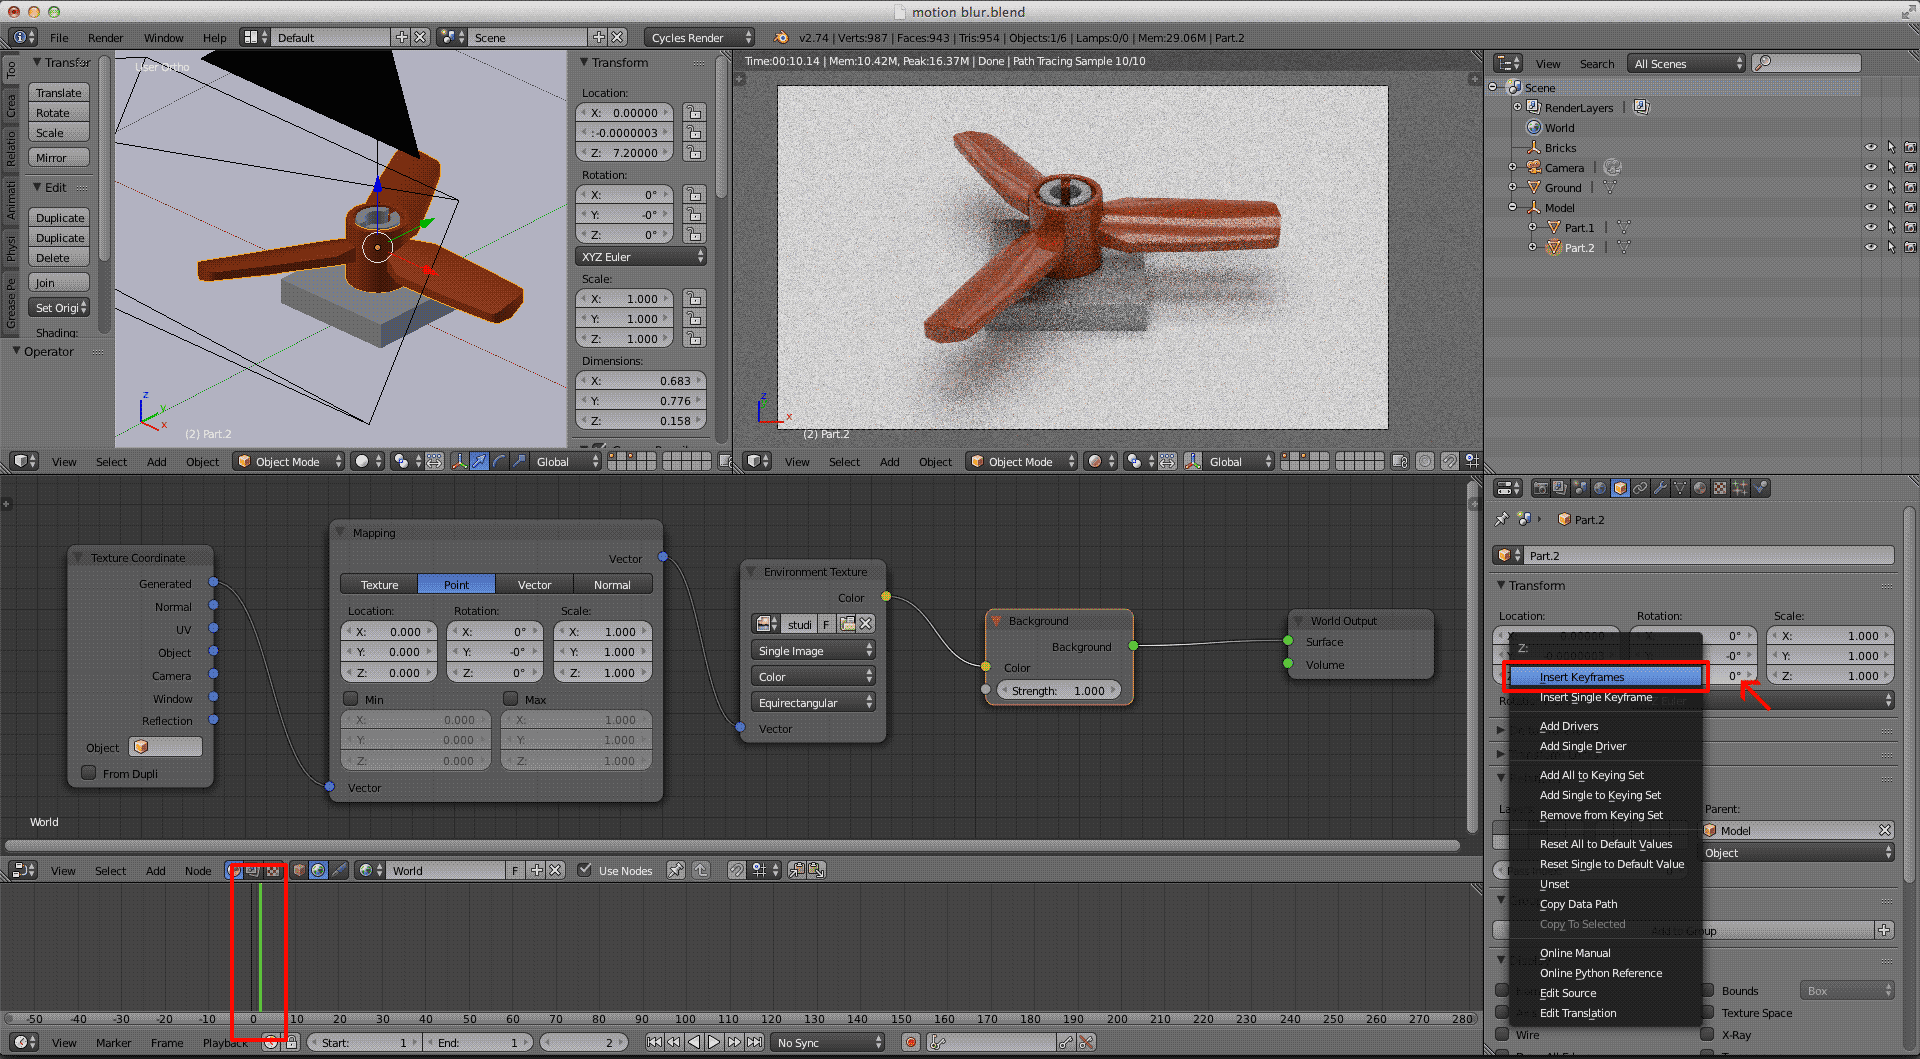
Move the green bar to the right (I put it on 30). Have you seen that the xyz rotation table has become green?
Write the value you want (I put 3600, it means that in 30 frames will make 10 rotations), then right click and insert keyframes.

When you have done, you'll see two yellow keyframes on the timeline. If you move with the green bar, the propeller will move!

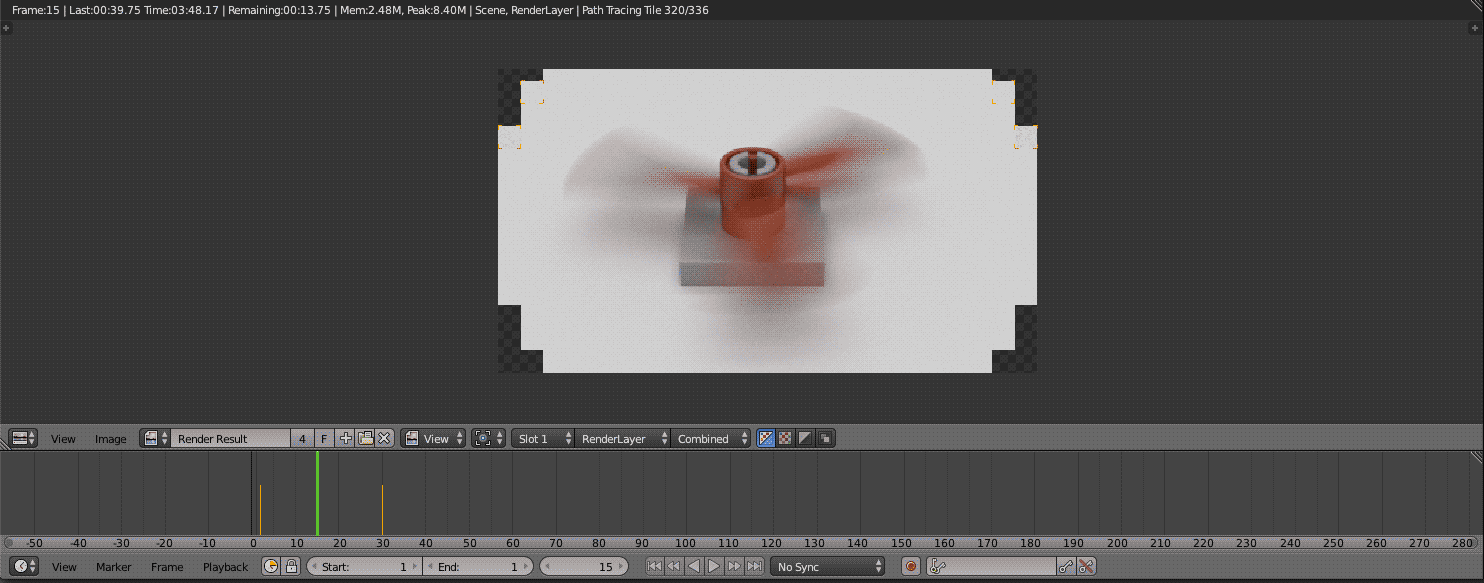
Step 6 - render
Put the green bar between your keyframes and render 😃
Considering that you'll need to make some attempts to get the effect you want, I advise you to do some fast render (low quality) or only render part of the scene.
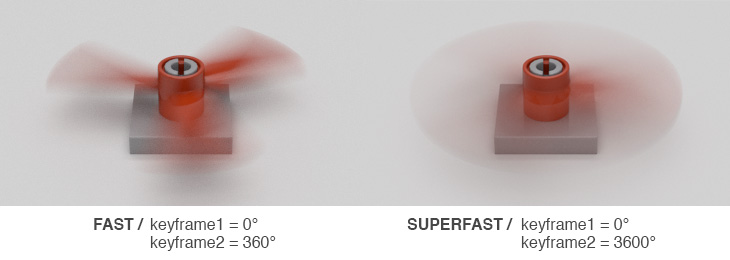
Step 7 - less or more blur
If you want to blur even more your object, increase the second keyframe's rotation. To change a keyframe put the green bar above it and increase the value in the box. Right click and Replace keyframes.
On the contrary, to slow it down. You can also reduce blur by decreasing Shutter value (render palette > motion blur > shutter).
Here are some examples! 😉

Nice! I'll be sure to try this out.
Let me know if explanations are clear and if you can do it! 😉
Very cool!! Maybe when you have time, you could do a short tutorial on how you achieve depth-of-field, like in your Detective's Office b&w render? That would be really great! How long did it take you to do that render, and did you add a b&w filter after you rendered it?
Sure, I'll do it! It's very easy 👌 📷
That render took a lot of time because there were some hundred of pieces @_@
Once finished, I edited the render in photoshop, adding the b&w filter 😉
Hi LeGoMaNiAc02, I just added the Depht of Field tutorial 😉
Thanks zanna! I'll check it out!
Re-rendering my Stratoplane with Depth of Field, motion blur, and an emit shader on the flame. I should make a tutorial for how to do this...
Very useful! Thanks, zanna!
This is a very helpful tutorial. But do you know how to add blur to multiple pieces that are moving instead of rotating? I'm trying to make a guy be falling, but I'm having lots of issues. 😃
In a render of a car I did, I added motion blur to the background by having the keyframes change the position instead of the rotation. You need to make sure that the slider is somewhere in the middle of the timeline though, otherwise the blur won't show up.
@TheFedoraGuy There is a way around that. If you go into the Graph Editor, press T, and on the menu that pops up choose Linear for the Interpolation. This make the speed of the animation constant between key frames.
I'd pretend I know what you're saying but I don't. 😛 I'm no Blender expert by any means. I'll have to try that next time.
@zanna First of all, thanks for a great tutorial!
Second, as @fatsomania36 mentioned, how do you select multiple parts?
I am trying to make a "missile" get blurry 😉
I also used your DoF tutorial, it adds new dimensions to the whole set! It's like noise, it makes things a lot better! 😎
Keep up the good work!
@zanna @fatsomania36 I solved it! It was too easy, I just selected the parts and used Parent - Object 😃
I'm having a bit of trouble with this. I'm trying to make a helicopter propeller blur but the helicopter is at a slight angle so this causes all three values to change. Do I just have to sit down and do a bit of math or is there an easier way? Oh and thank you zanna for taking the time to sit down and right this up. I really appreciate your tutorials!
@Malman You need to rotate in local axis mode. You can use the shortcuts or the manipulator handles for this. The menu inputs are bound to the global axis and I haven't heard of a way to change that. If you use the rotation shortcut (R by default) you can tap the letter corresponding with the axis you want to rotate on e.g. Z for the Z axis. If you tap the key once it will rotate in global mode and if you tap i twice it will rotate in local mode. Tap it a third and it switches back to free rotation. You can also set the amount you want to rotate by. Just type it after selecting the axis.
If you download the latest Blender version (2.7😎 you have more control over the motion blur (cuve values etc.). Just as a hint, renderings are looking cool! 😉
@Azogthedefiler I had to read that several time! After hours of work and several youtube blender tutorials I got it to work. The tricky part was that it is at an angle. Thanks for you help. I'll be posting the render soon...
@MalMan35 ya i guess it does sound a little confusing. 😛 anyway glad you figured it out. 😉
Very nice! Thanks for the tutorial. I think the UI has changed a bit since then, even more so when 2.8 is released. 😉
LEGO, the LEGO logo, the Minifigure, and the Brick and Knob configurations are trademarks of the LEGO Group of Companies. ©2026 The LEGO Group.
Mecabricks, the Mecabricks logo and all content not covered by The LEGO Group's copyright is, unless otherwise stated, ©2011-2026 Mecabricks.