You have probably noticed that the part library of mecabricks doesn't include all the bricks ever made by the LEGO company! So if you wish to help me complete this huge task, you are more than welcome. Here is a quick tutorial explaining roughly how to model the parts.
Software requirements:
I use Blender which is a free 3D software. However you can use any others as long as the parts can be exported somehow as js files compatible with three.js which is the 3D framework used by mecabricks. I know that by default, three.js provides addons to directly export from Blender, 3ds Max and Maya.
Tool requirements:
Dimensions are based as much as possible on real parts with a few approximations. So something to have handy is a calliper.
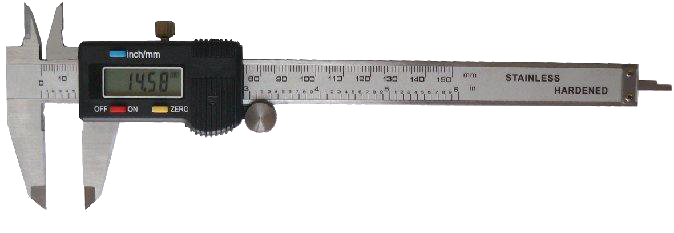
Rules:
Here are a few rules that you should try to follow as much as you can in order to get a good result.
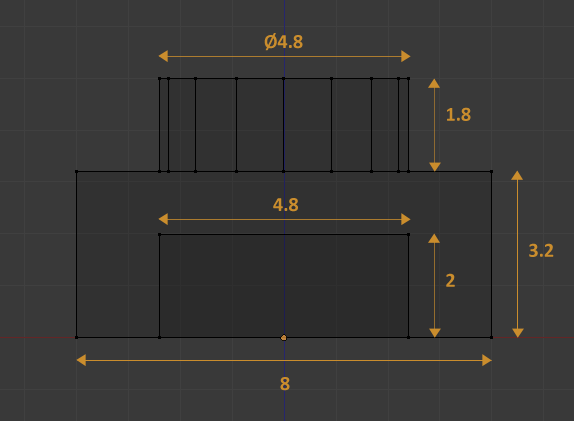
Here is the example for the 1X1 plate:
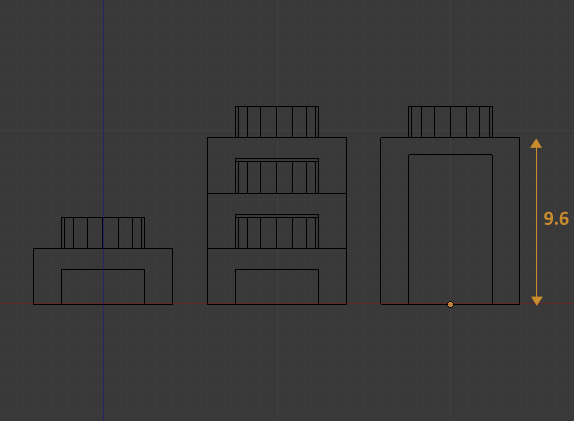
3 plates correspond to the height of 1 brick:
For the round top studs, it is a good practice to use 16 vertices:
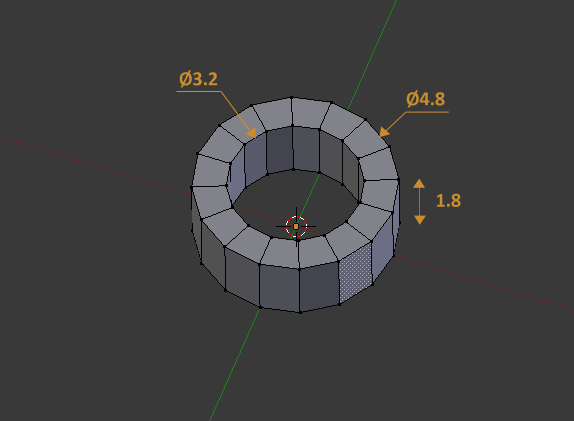
For the bottom studs as well:
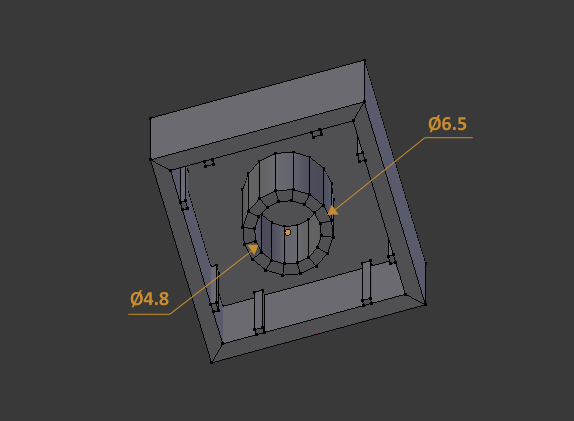
Once the part is modelled, the next step is to alter the outside dimensions so that there will be a gap between the parts when they will be assembled:
-0.04 for vertical surfaces
-0.02 for horizontal surfaces

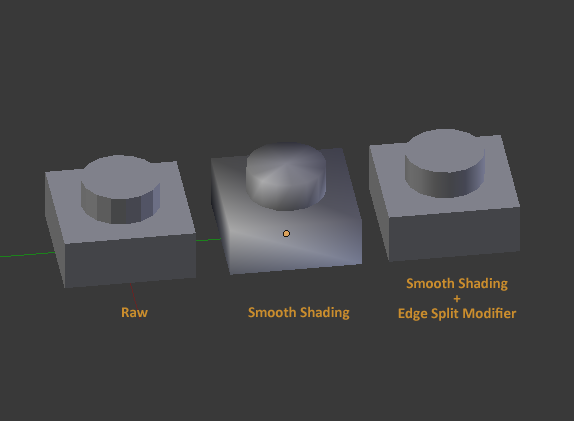
To finish, apply a smooth shading and an edge split modifier:
Because there is nothing better than examples, please download the blender files for the following part designs:
3003 | 3005 | 15573 |64644 | 2540 | 3024 | 3700 |6081 | 32523
For any questions related to part modelling, please use the Help and Tips forum.
LEGO, the LEGO logo, the Minifigure, and the Brick and Knob configurations are trademarks of the LEGO Group of Companies. ©2026 The LEGO Group.
Mecabricks, the Mecabricks logo and all content not covered by The LEGO Group's copyright is, unless otherwise stated, ©2011-2026 Mecabricks.